Initial setup
After your first sign-in, complete the basic setup before creating a VM. This guide walks through the dashboard and how to enable Internet connectivity for the default network.
Dashboard overview
The LANIT Cloud dashboard is the single place for everything: creating VMs, attaching volumes, configuring networks, managing users and opening support tickets. The left menu is grouped by service:
- Cloud Server — VMs, snapshots, volumes, SSH keys.
- Network — Network, Router, Security Group, Floating IP, VPN Gateway.
- Load Balancer — application traffic distribution.
- Simple Storage — S3-compatible object storage buckets.
- IAM — sub-accounts and permissions.
Default network configuration
Every LANIT Cloud account starts with a basic network setup:
| Resource | Default value | Note |
|---|---|---|
| Router | router | No External Gateway yet — VMs cannot reach the Internet |
| Network | default-network | Already attached to the default Router |
| Subnet | default-subnet (10.0.0.0/24) | Internal IP range handed to VMs, gateway 10.0.0.1 |
You can use this setup as-is or create your own network. To give VMs Internet access, enable the External Gateway on the Router using the steps below.
Enable the External Gateway
Step 1. Open Network → Routers in the left menu.
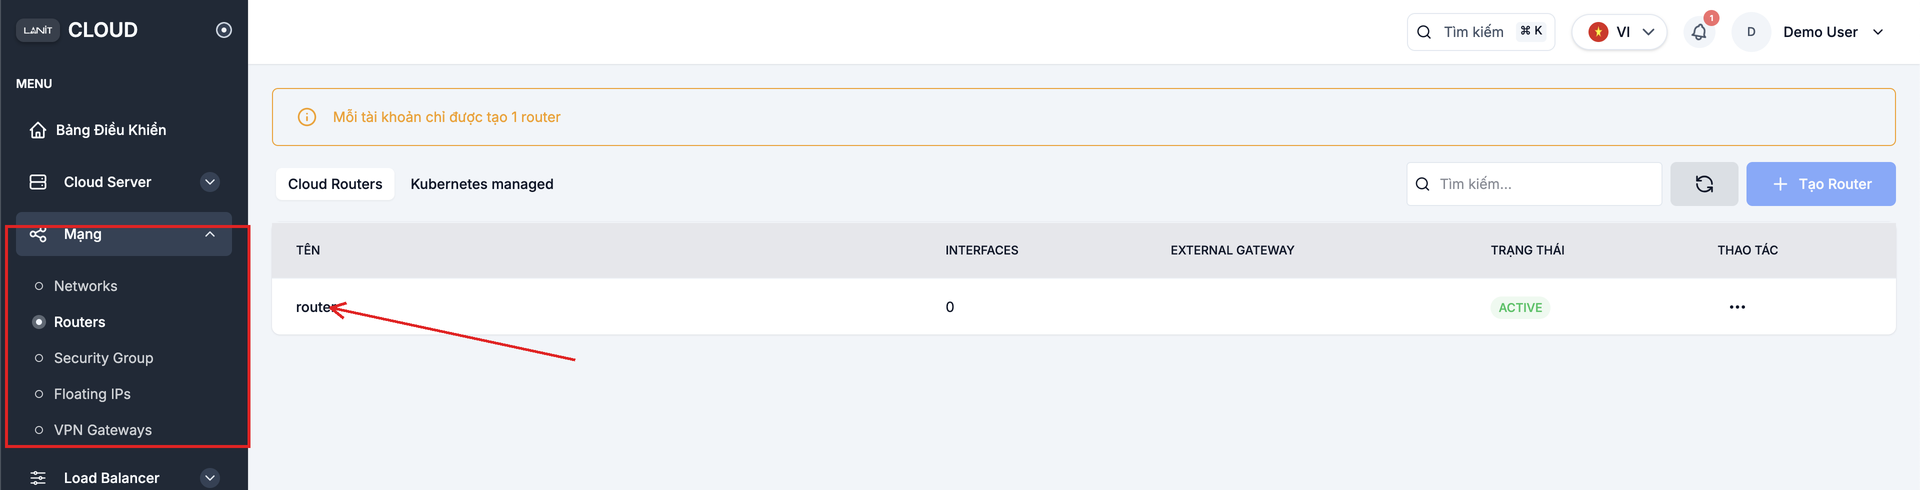
Each account can create exactly 1 Router. You use this Router to route every internal Network.
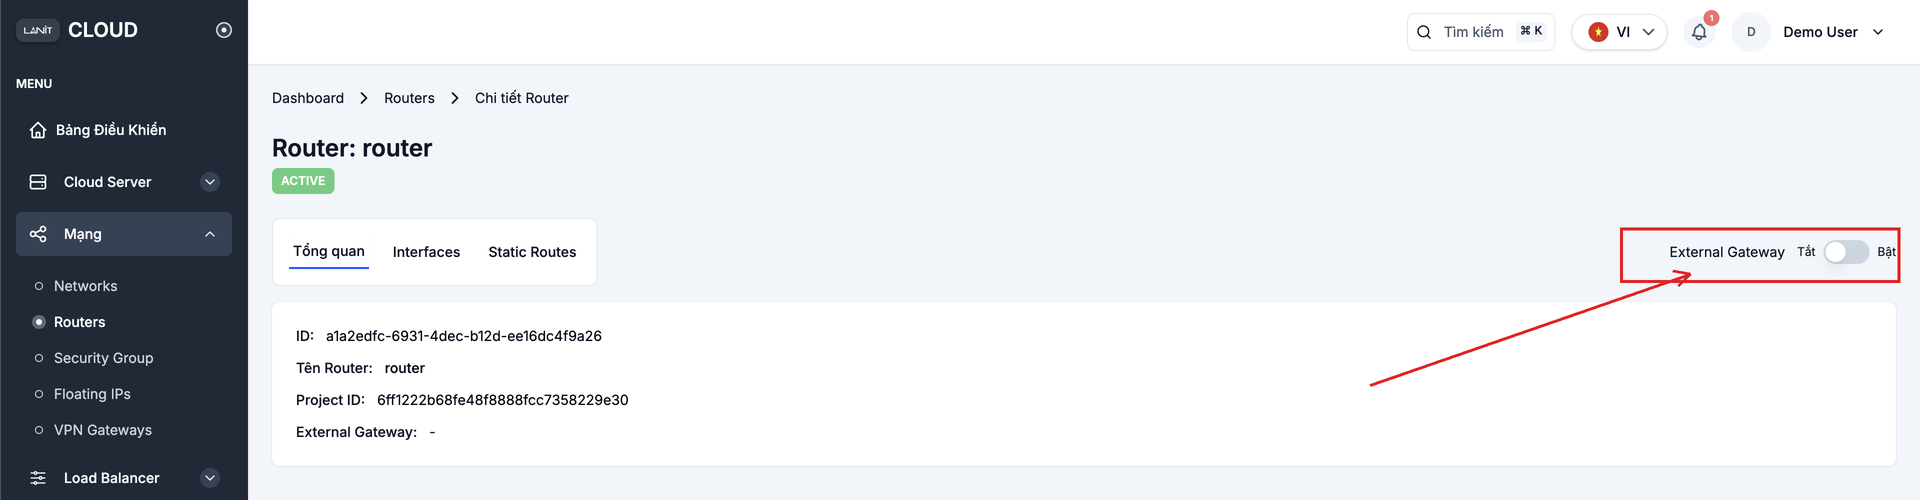
Step 2. Click the default Router to open its detail page. In the top right, flip the External Gateway switch from Off to On.
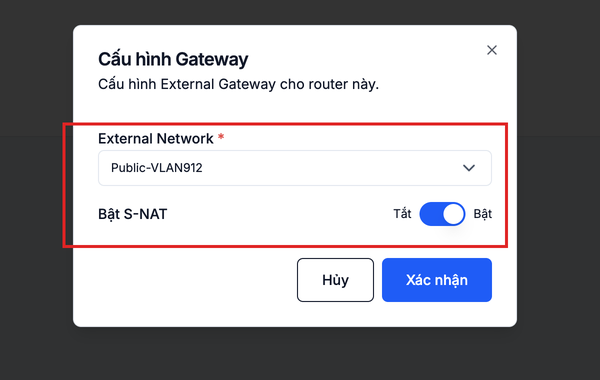
Step 3. In the Cấu hình Gateway (Set Gateway) dialog:
- External Network — pick the public network LANIT provides.
- Enable S-NAT — turn on to let VMs in internal networks reach the Internet through this Router (recommended).
Click Confirm to save.
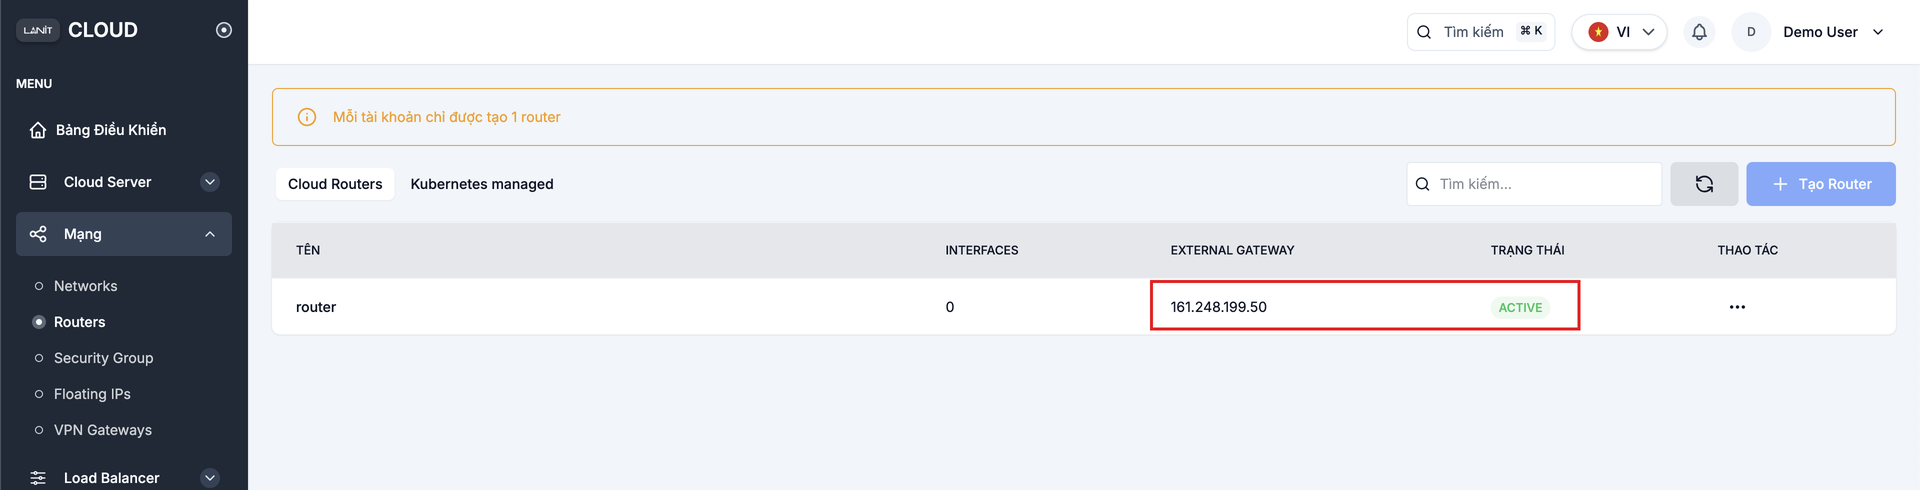
Step 4. Back in the Routers list, the EXTERNAL GATEWAY column shows the public IP with status ACTIVE — the Router is ready to route traffic out to the Internet.
With the External Gateway on, VMs can reach out to the Internet through S-NAT. To reach a VM from the Internet (SSH/RDP/HTTP), attach a Floating IP — see the Floating IP guide.
Next steps
- Create your first VM — use the network you just set up.
- 2FA security — enable two-factor authentication on your account.
- Manage Security Groups — control the firewall for VMs.