Create your first VM
This guide walks the full Cloud Server page, from picking a boot source to confirming the order. Everything is on a single page — you scroll top to bottom and fill it in section by section.
- You've signed in to the Portal.
- You've enabled the External Gateway on the Router (if the VM needs Internet access).
- Your account has enough balance for the configuration you pick (see Account balance on the dashboard).
Steps
Step 1. Open the create-VM page
Go to Cloud Server → Servers. With no VMs yet, the page shows "No servers" — click + Create Server (the same button is also at the top right of the Servers list and on the dashboard).

Step 2. Pick a boot source
Under Choose operating system, pick one of three boot sources (tabs):
Image
Pick a built-in OS image: Ubuntu, Windows, Rocky, CentOS, AlmaLinux, Debian. For each OS, click Select version to choose a specific build (for example Ubuntu 24.04 LTS).
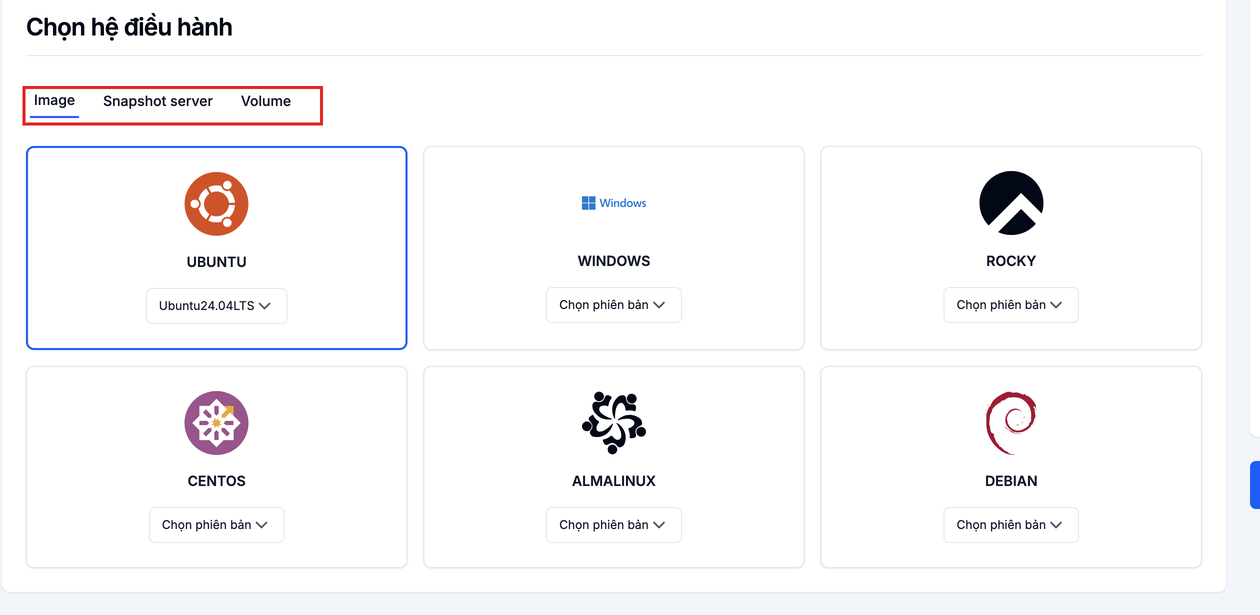
Snapshot server
Boot from a snapshot of an existing VM — handy for cloning environments or restoring.

Volume
Boot from an existing bootable volume — useful when you've prepared a custom image.

Step 3. Pick the billing period
Under Billing, pick a prepay period: Prepay 1 month, 3 months, 6 months or 12 months. Longer periods are usually cheaper; the matching cost appears in the Order summary panel on the right.

Step 4. Configure the server
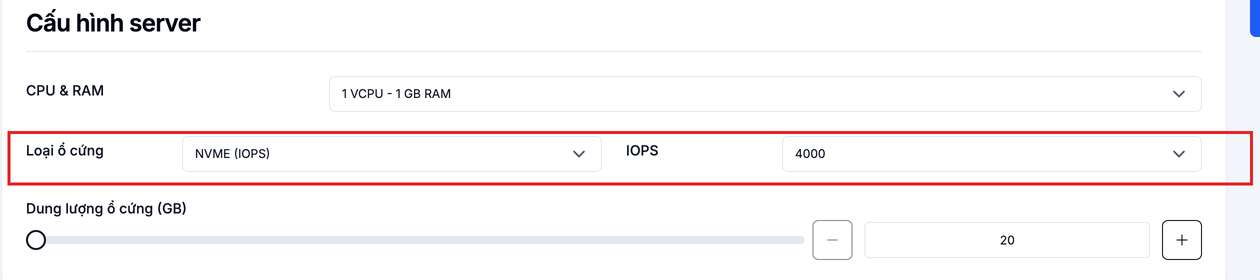
Under Server configuration, pick the VM resources:
- CPU & RAM — pick a plan (for example
1 VCPU - 1 GB RAM). - Disk type —
NVME (IOPS). - IOPS — pick
4000or5000. - Disk size (GB) — drag the slider or type the number of GB.
You can scale up after creation — see Change configuration.
Step 5. Configure networking and Security Group
Under Interface, choose how the VM attaches to the network with the Port / Network switch:
- Network — the internal network the VM joins (defaults to
default-networkwith subnet10.0.0.0/24). - Port — attach to a pre-created Port.
Under Security Group, pick the firewall group that controls inbound/outbound traffic. The default is Default; you can pick multiple Security Groups.
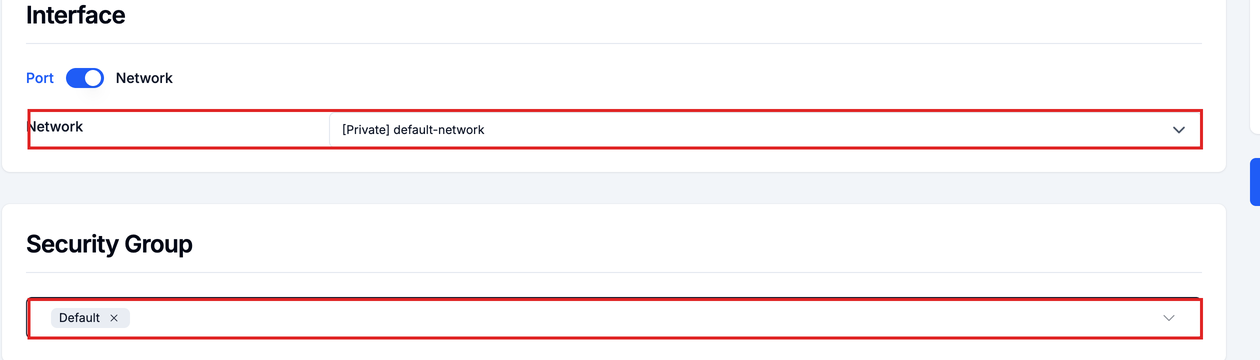
The Default Security Group allows outbound traffic but blocks inbound. If you need SSH/RDP from the Internet, open the matching port in the Security Group — see Manage Security Groups.
Step 6. Sign-in details
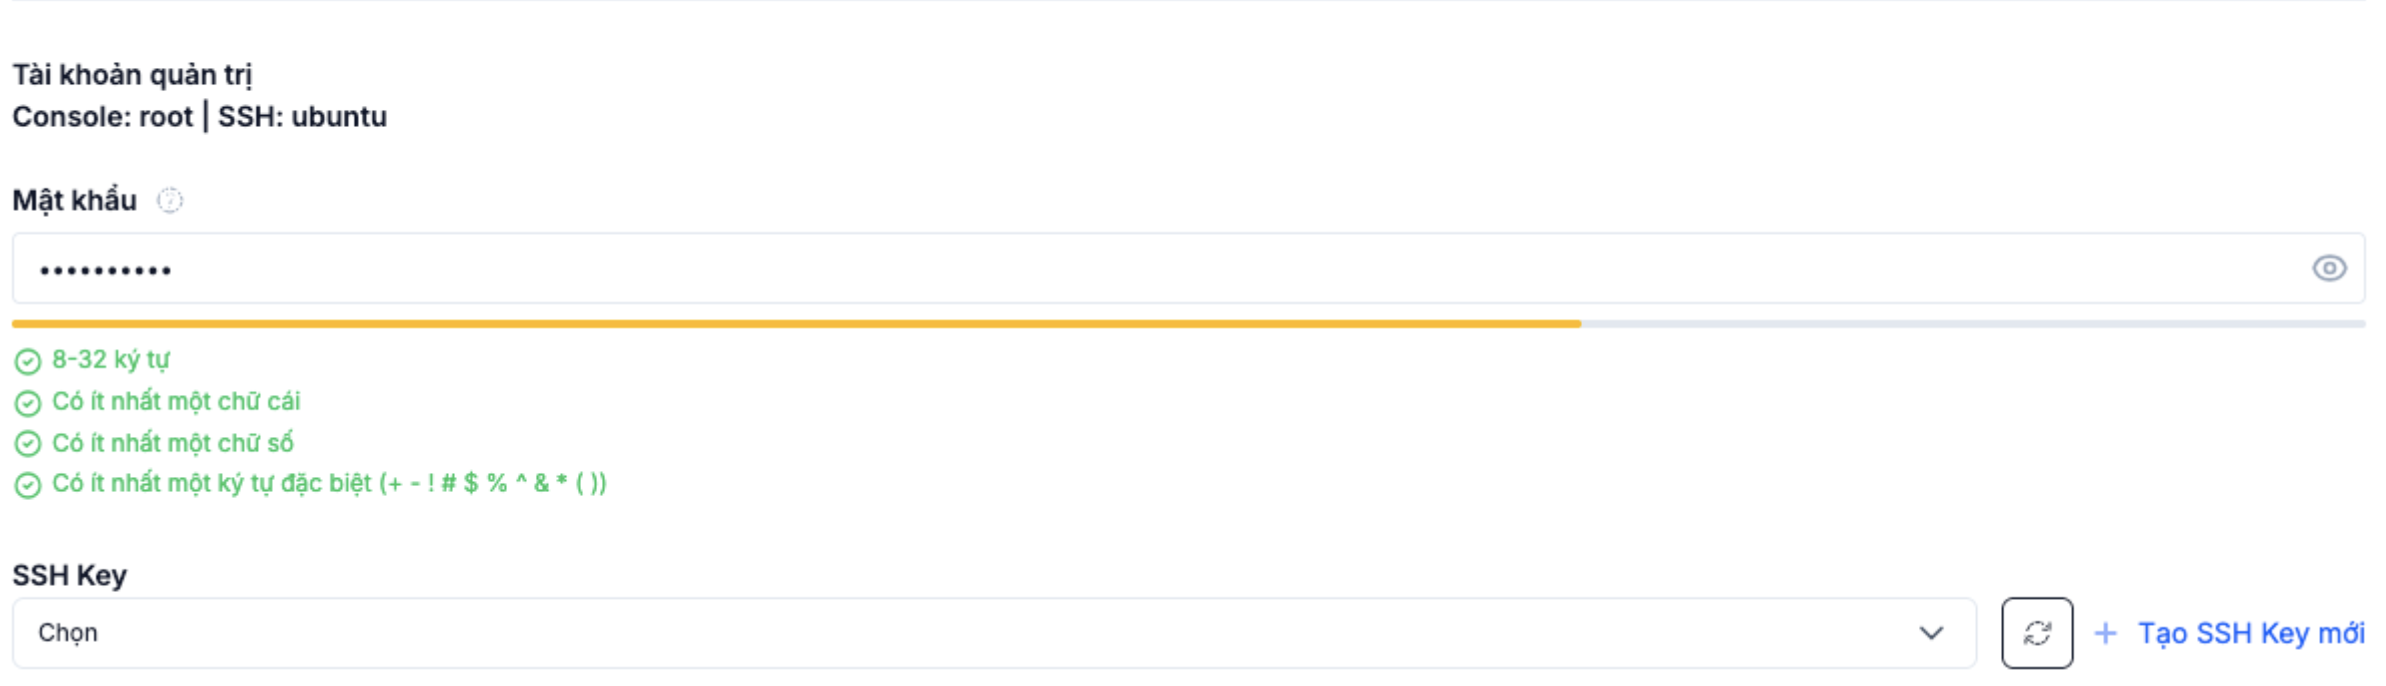
Under Sign-in details, the admin account is preset by the image: Console: root | SSH: ubuntu. Pick how to sign in to the VM:
- Password — set a password for the admin account.
- SSH key — pick an existing key, or click Create SSH key to make a new one. SSH keys are safer than a password and recommended for production. See SSH Key.
Step 7. Name, review the order and confirm
- Number of servers — how many VMs to create (defaults to 1).
- Server name — name the VM.
Review the Order summary panel on the right (disk, IOPS, OS, SSH key, Monthly fee and Total), then click Confirm.
When the VM shows up in the Servers list with status Active, provisioning is done.
Next steps
- Access the VM via SSH / RDP — sign in from your local machine.
- Attach a Floating IP — give the VM a public IP.
- Create a Snapshot — save the VM state.
- Change configuration — scale vCPU, RAM, disk size up or down.