Register & sign in
The first step to using LANIT Cloud is creating an account and signing in to the Portal.
Create an account
Step 1. Open the LANIT Cloud sign-up page.
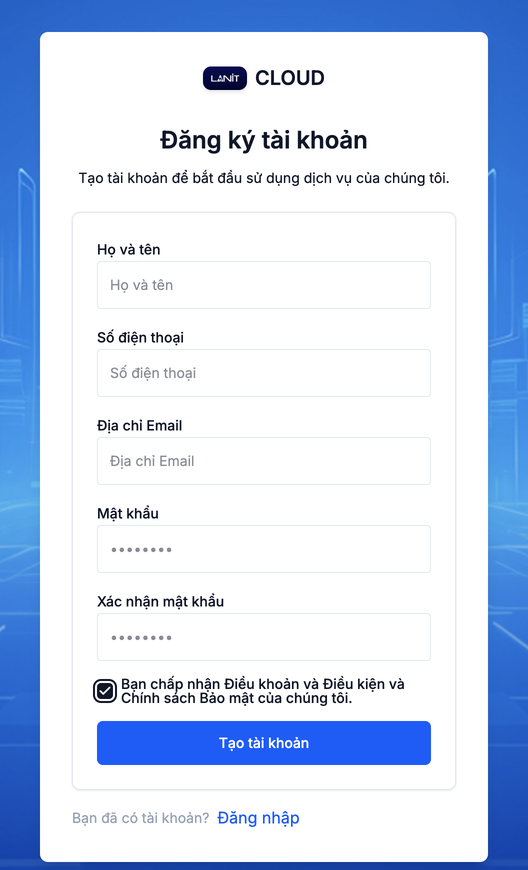
Step 2. Fill in the form:
- Full name — the display name on the account.
- Phone number — used for contact and verification.
- Email address — also the sign-in username; use an inbox you can access.
- Password — minimum 8 characters with upper case, lower case, number and special character.
- Confirm password — re-enter the same password.
Tick I accept the Terms and Conditions and Privacy Policy, then click Create account.
Step 3. Open the inbox you just registered and click the verification link in the email from LANIT Cloud.
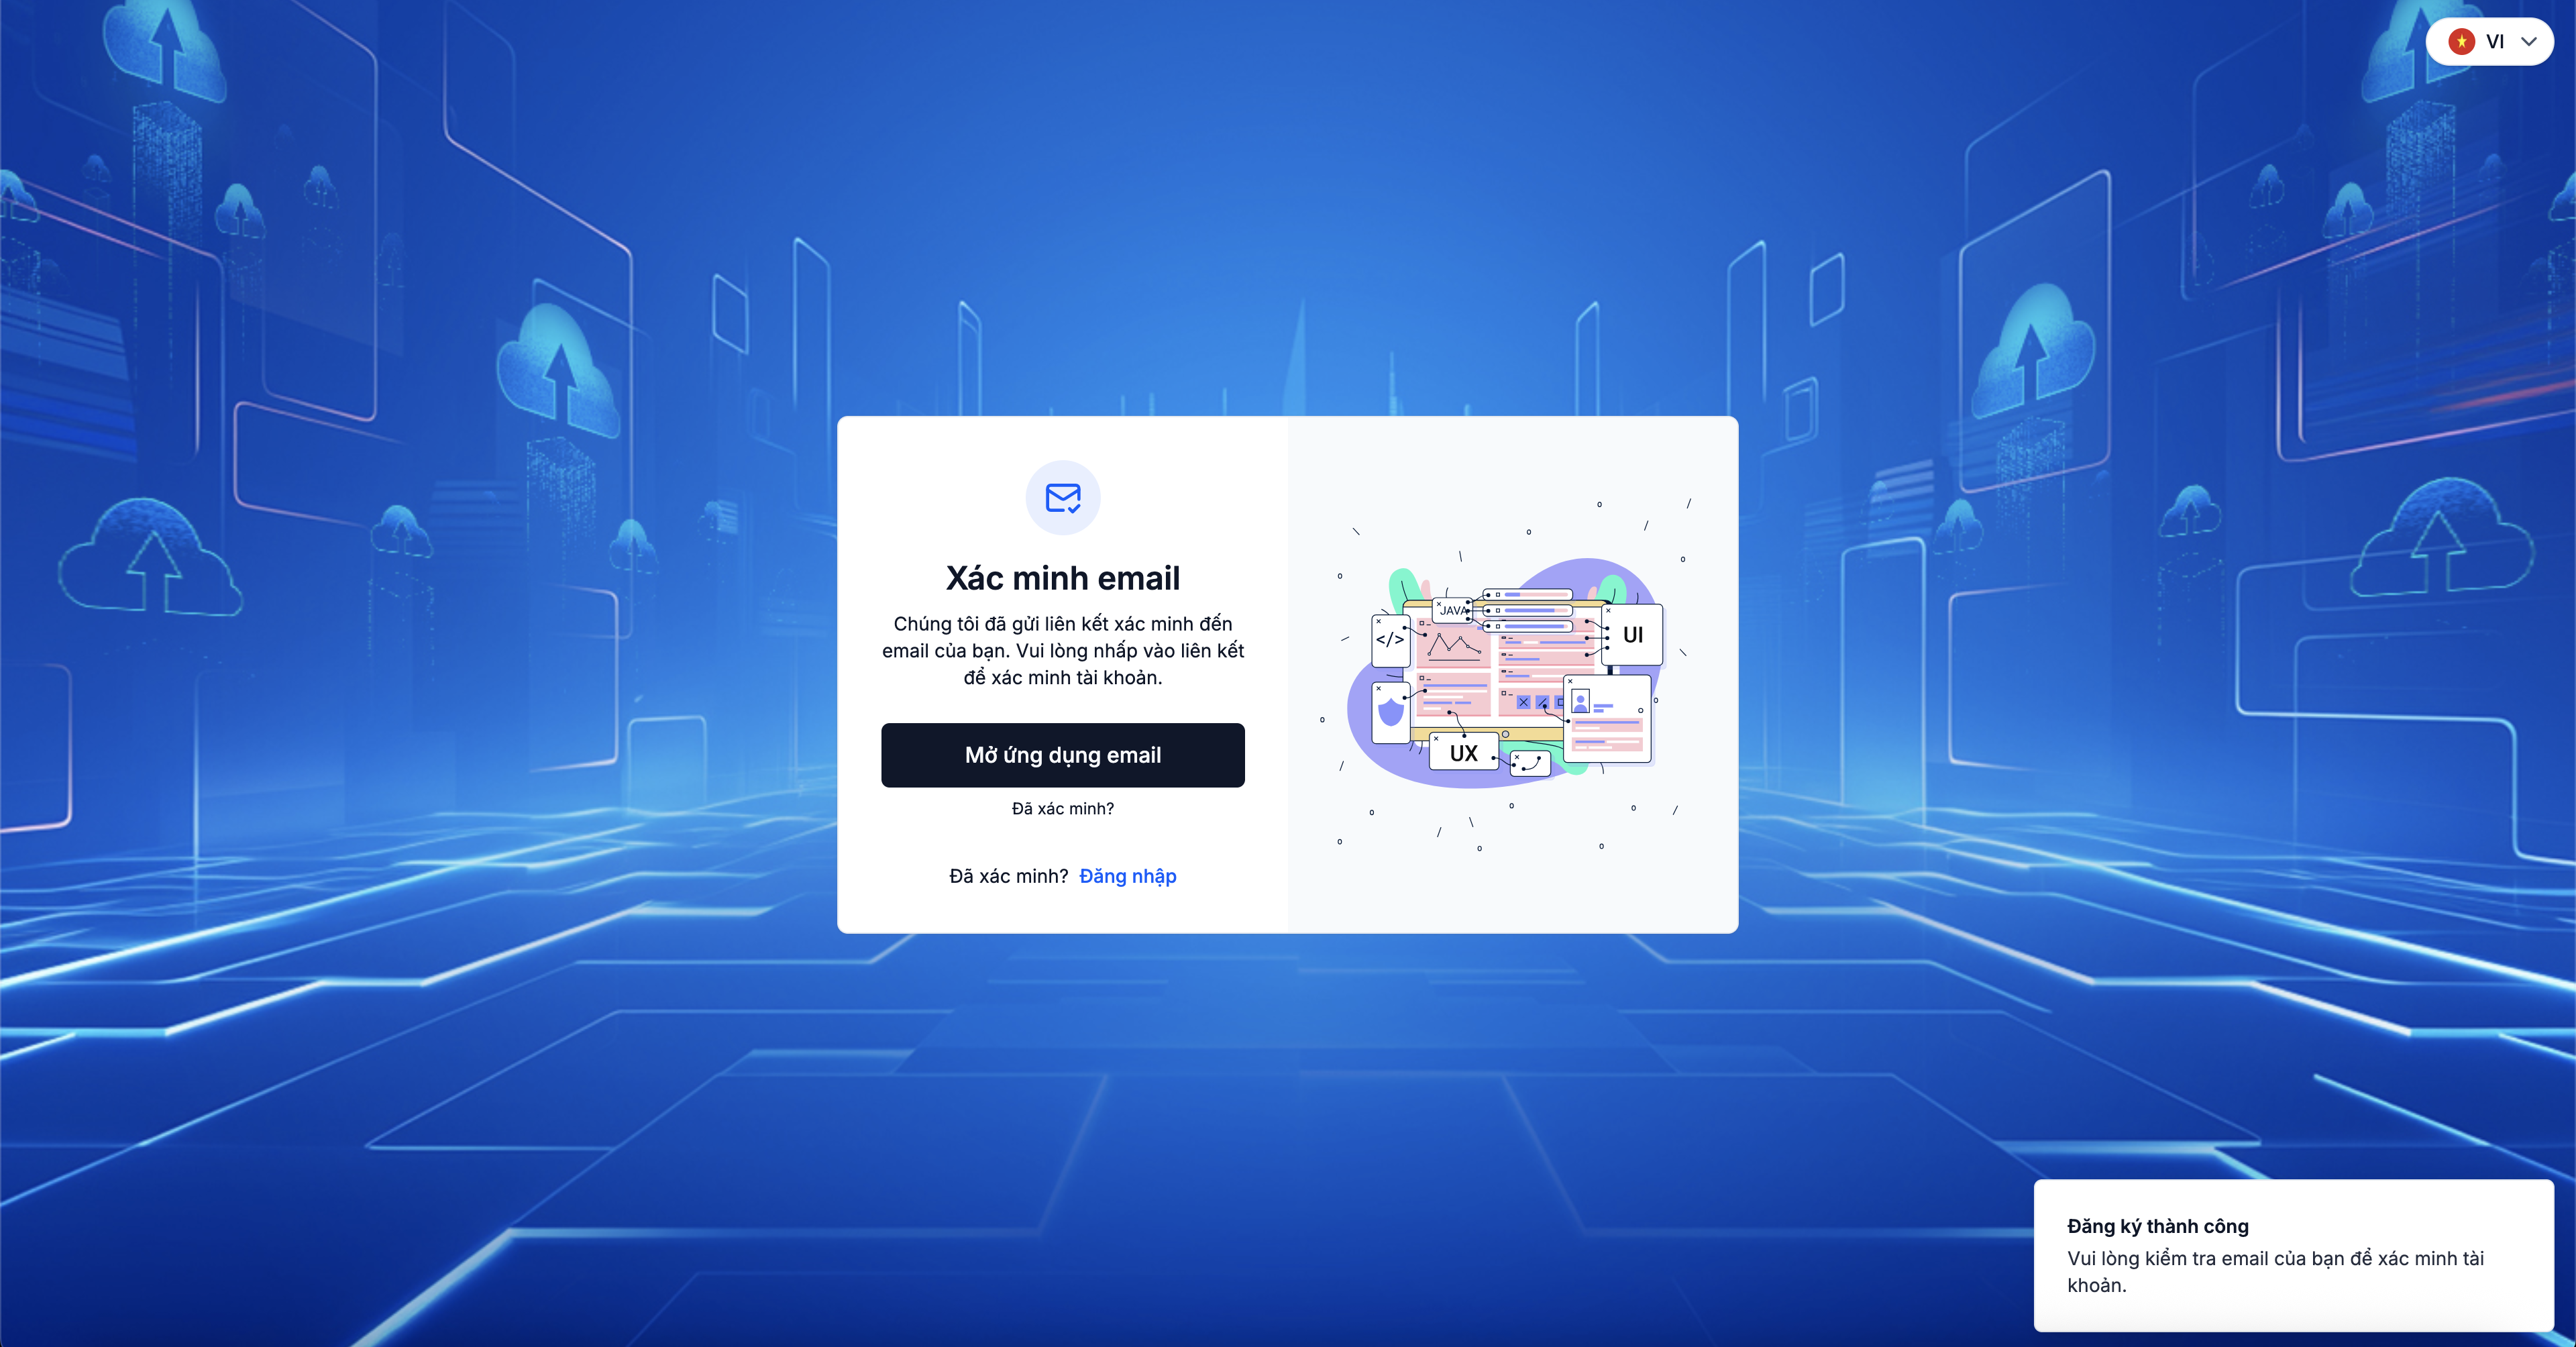
Step 4. Once verified, the account is active — continue with Sign in to the Portal.
The verification email may take a few minutes. If it's not in Inbox, check Spam/Junk. The link is valid for 24 hours — past that, request a fresh one from the sign-in page.
Sign in to the Portal
Step 1. Open the Portal sign-in page.
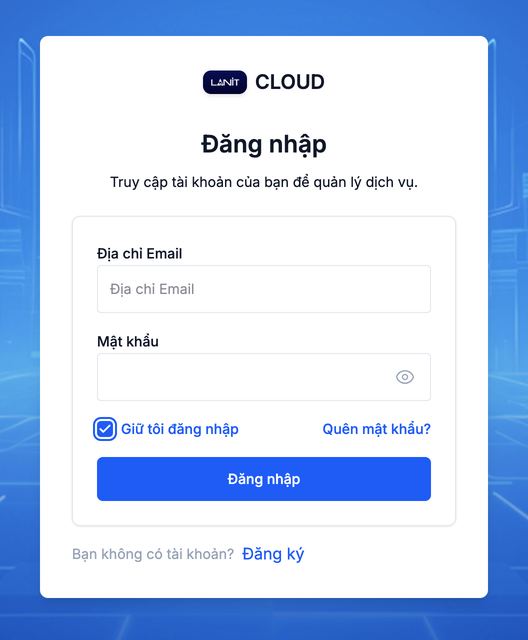
Step 2. Enter the Email address and Password you registered.
Step 3. If two-factor authentication (2FA) is on, type the 6-digit OTP from Google Authenticator (or an equivalent TOTP app).
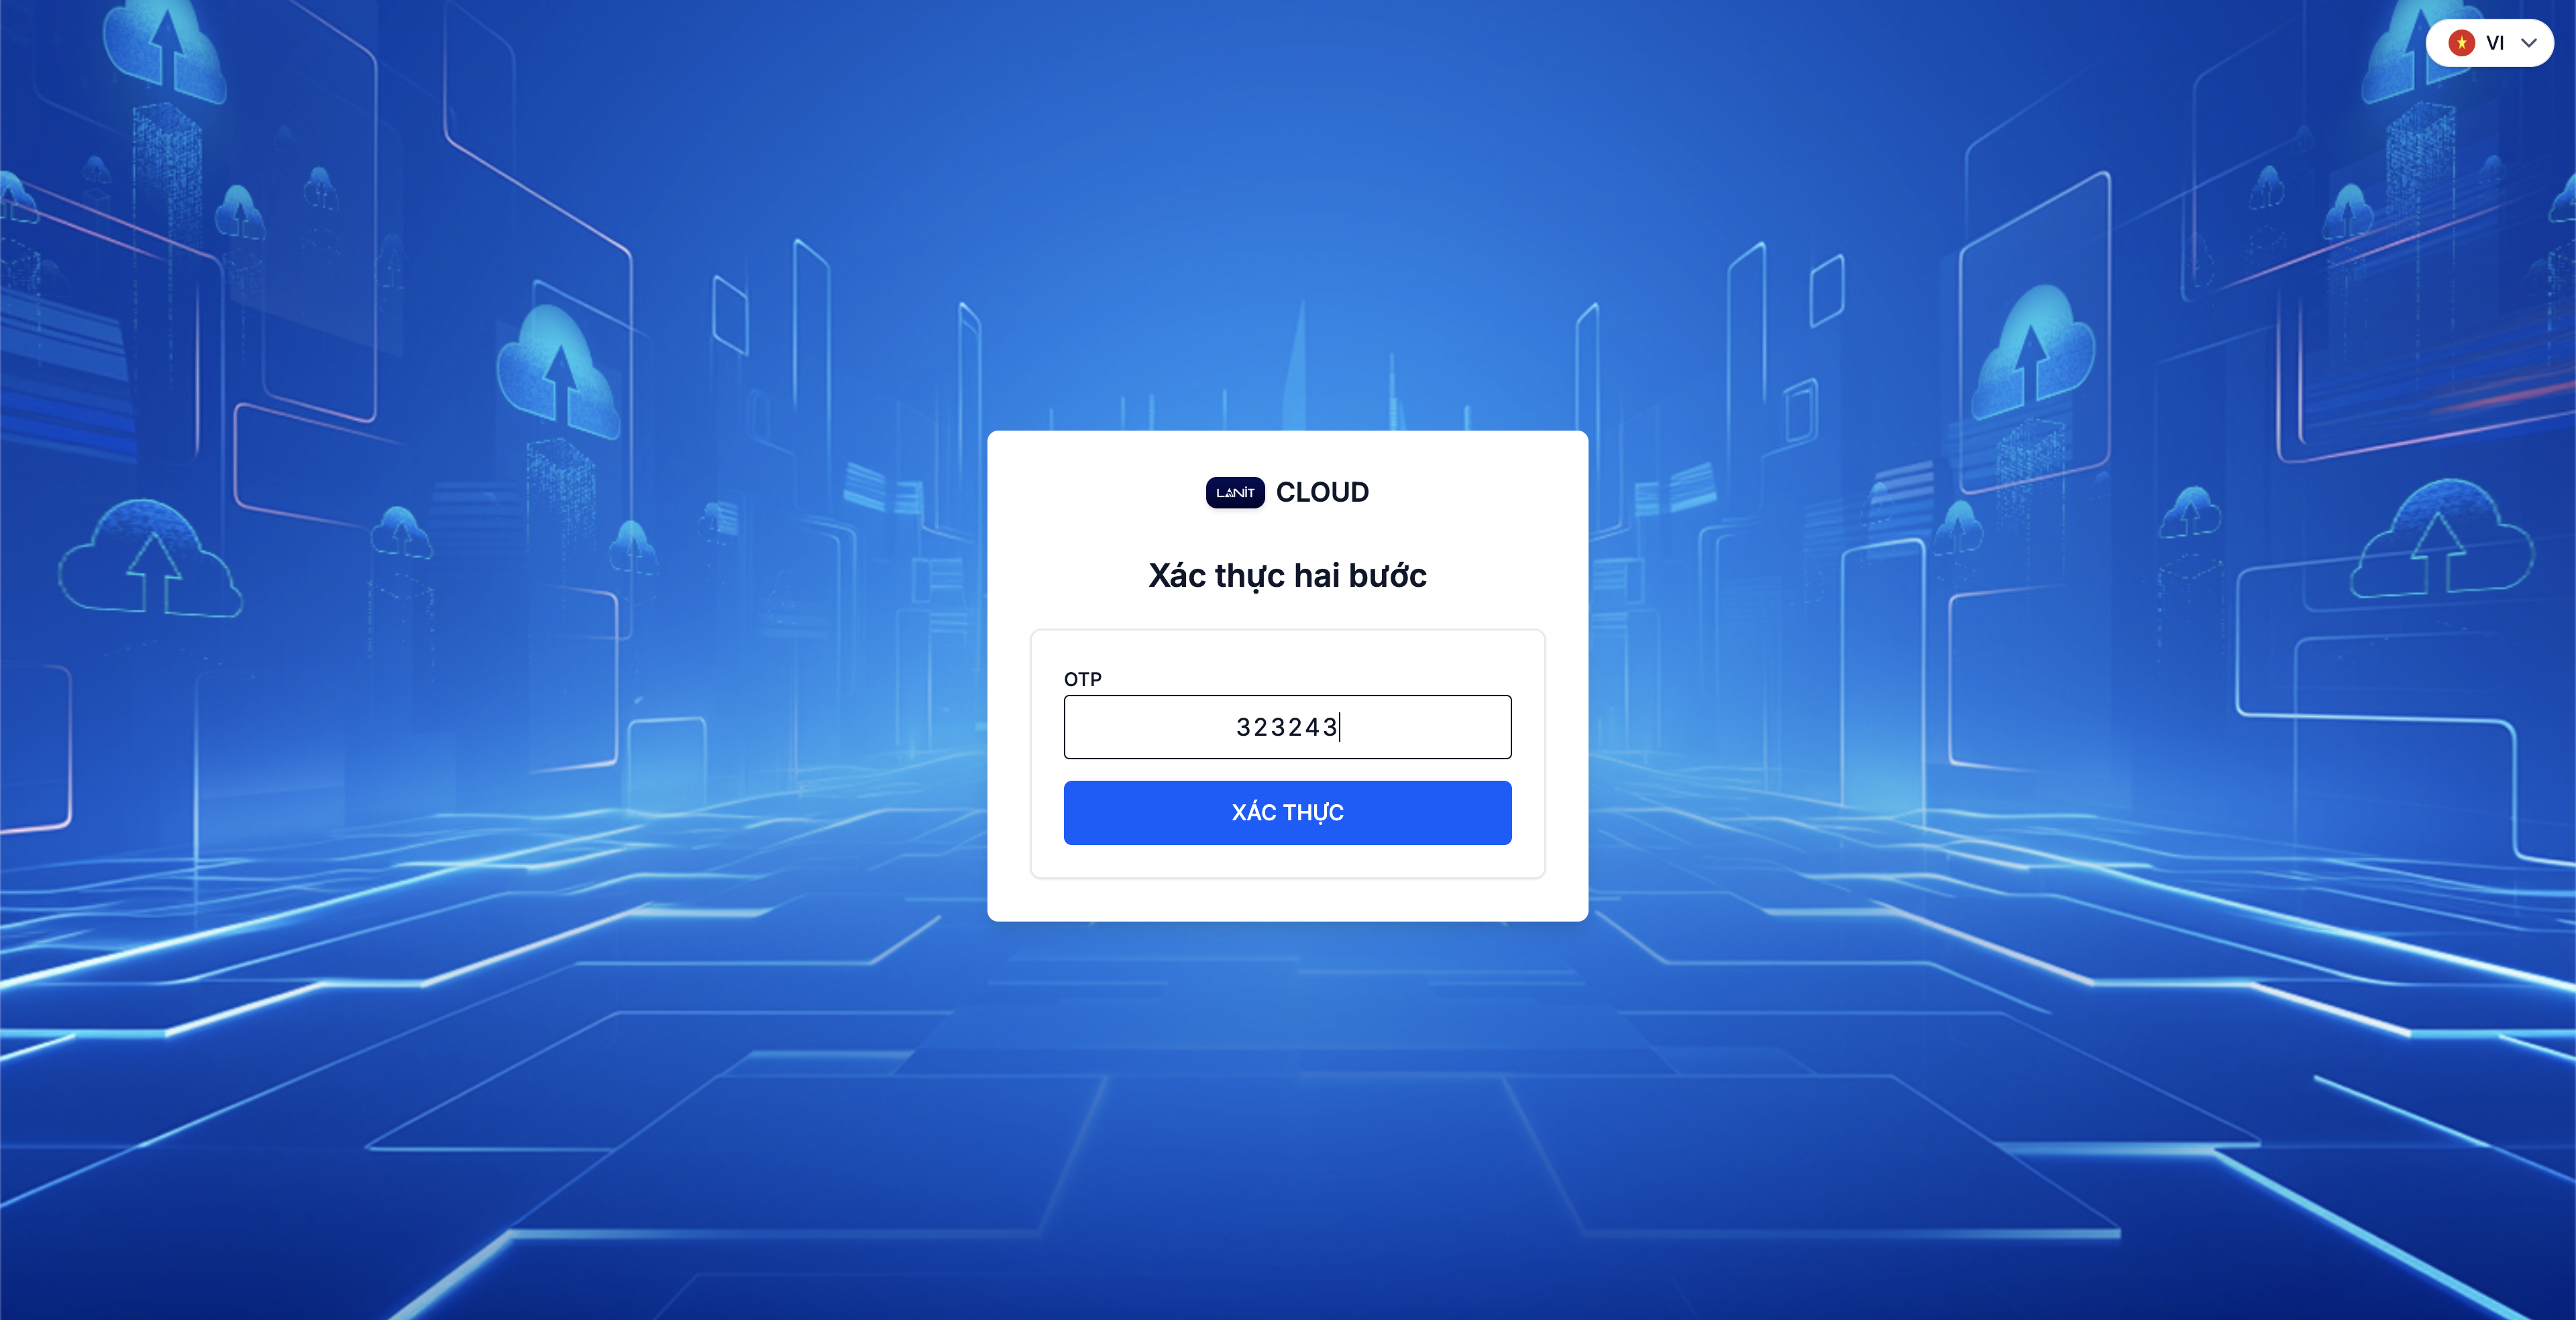
Step 4. Click Sign in to enter the dashboard.
Tick Keep me signed in on a trusted device so the Portal doesn't ask you to sign in again for a while. Don't use this option on a shared computer.
Next step
After your first sign-in, complete Initial setup to configure the Router and check Security Groups before creating a VM. If you haven't enabled 2FA yet, see 2FA security.