Add a sub-account
A sub-account lets you grant Portal access to a teammate without sharing the master account. Each sub-account is assigned a role that defines its permissions.
Why it matters:
- One person, one account — clean audit logs for who did what.
- Role-based access — managers, accounting and engineering each get the rights they need.
- Fast revocation when someone leaves — no need to rotate the master password.
You need a Master or Admin account to create and manage sub-accounts.
Open the IAM page
Sign in to the Portal. From the left menu, click IAM.
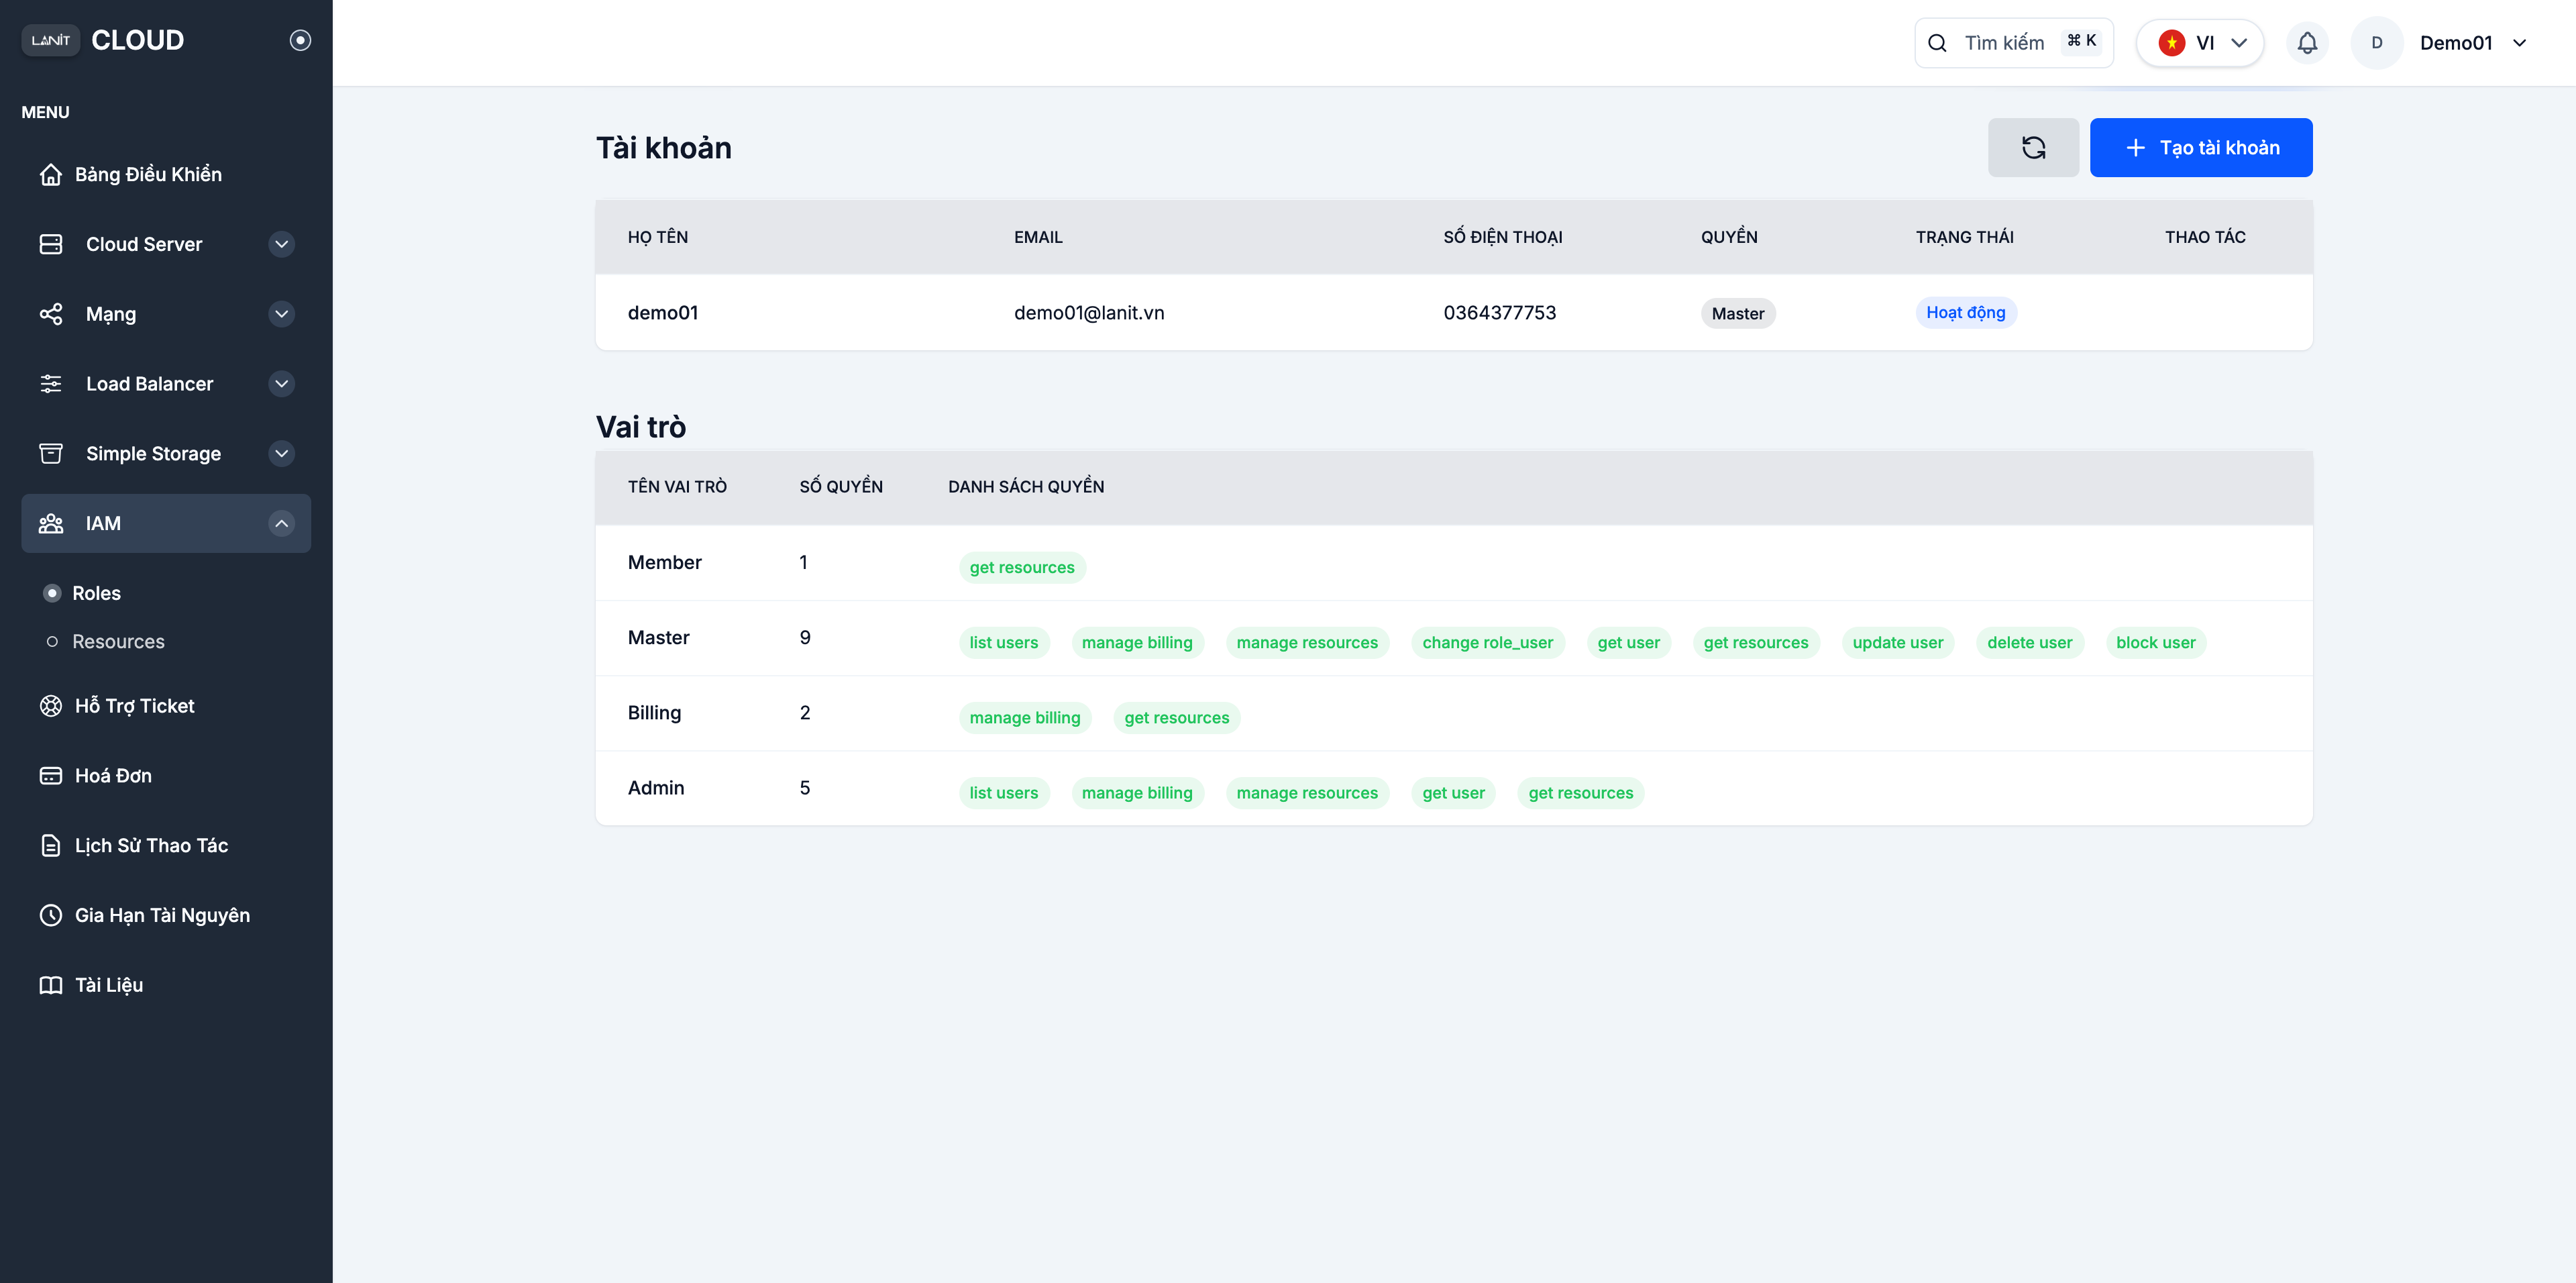
The IAM page has two parts:
- Accounts — every account (master + sub) with Name, Email, Phone, Permission, Status.
- Roles — the available roles and how many permissions each one carries.
Available roles
| Role | Main rights | When to use |
|---|---|---|
| Member | Read-only access to resources (get resources) | Interns, read-only users |
| Billing | Manage billing + read resources | Accounting, finance |
| Admin | Manage resources + billing + users | DevOps lead |
| Master | Full access — resources, billing, users | Account owner, CTO |
Per-role permissions are listed in Sub-account permissions.
Create a sub-account
Step 1. Open the Add account form
On the Accounts tab, click + Create account in the top right.
Step 2. Fill in the form
| Field | Description | Note |
|---|---|---|
| Email (required) | The email of the person receiving the sub-account — also used to sign in | Each email can be registered once across the whole system |
| Permission (required) | Pick one of the available roles | Can be changed later |

Open the Permission dropdown to see all 4 available roles:
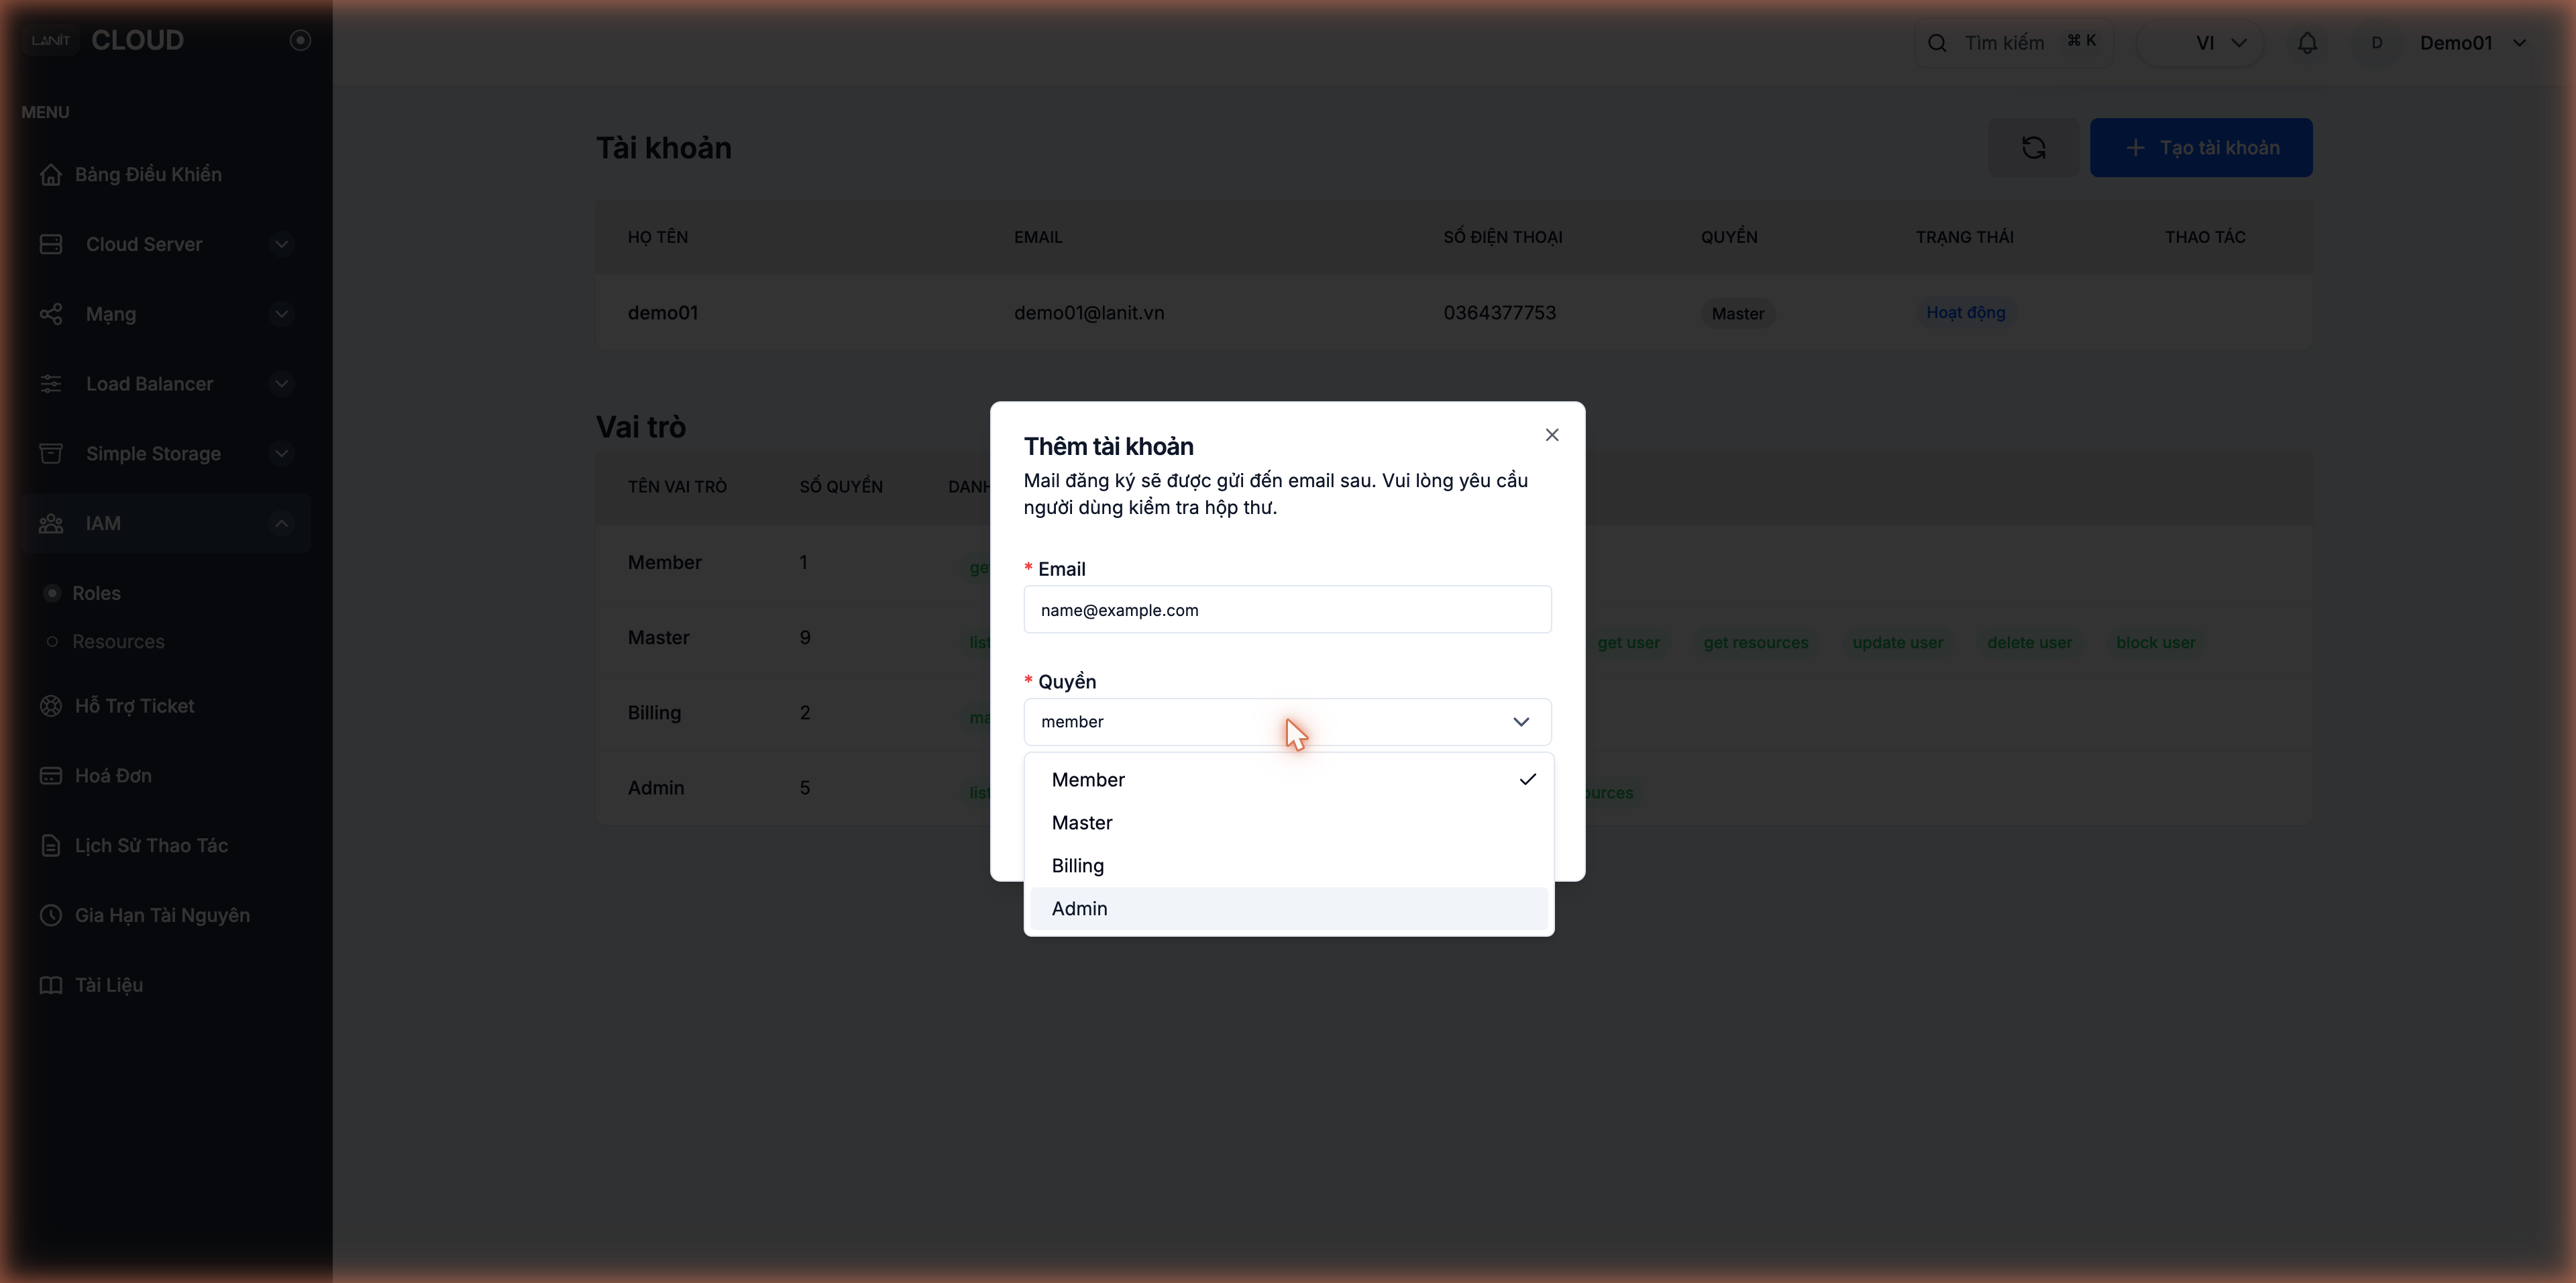
Click Confirm.
Step 3. The user activates via email
The system sends an invitation email to that address. The invitee:
- Opens the email from LANIT Cloud and clicks the activate account link.
- Sets a new password (minimum 8 characters with upper case, lower case, number, special character).
- Signs in at the Portal with the email and new password.
If the email doesn't show up in the inbox, check Spam/Junk. The activation link is valid for 24 hours — past that, delete the sub-account and re-invite.
Step 4. Enable 2FA on the sub-account
We strongly recommend that every sub-account turns on 2FA — see 2FA security. A sub-account without 2FA is the weakest link in the IAM setup.
After creation
The new sub-account appears in the list with one of these statuses:
- Active — activated via email, ready to sign in.
- Pending — waiting for the user to open the email.
You can:
- Change the sub-account's role.
- Disable temporarily (blocks sign-in but keeps related data).
- Delete the account when the user leaves.
Notes
- Each email maps to exactly one account in the whole LANIT Cloud system — if it's already in use by another org, you cannot add it here.
- Sub-accounts share billing with the master account — every resource a sub-account creates is billed to the master.
- Permission changes take effect the next time the sub-account signs out and back in.
See also
- 2FA security — required for every sub-account.
- Sub-account permissions — what each role can do.