Router management
The Router is the gateway that connects Subnets to each other and out to the Internet. The Router handles:
- Internal routing between Subnets in the account via Interfaces.
- Internet routing through the External Gateway with S-NAT.
- Static routing to special networks via Static Routes (site-to-site VPN, private networks…).
Each LANIT Cloud account can create exactly one Router. Every internal Network that needs routing shares this Router.
Enable the External Gateway
The External Gateway connects the Router to LANIT's public network — VMs in internal Networks reach the Internet through S-NAT.
Step 1. Open the Router detail page
Go to Network → Routers and click the Router.
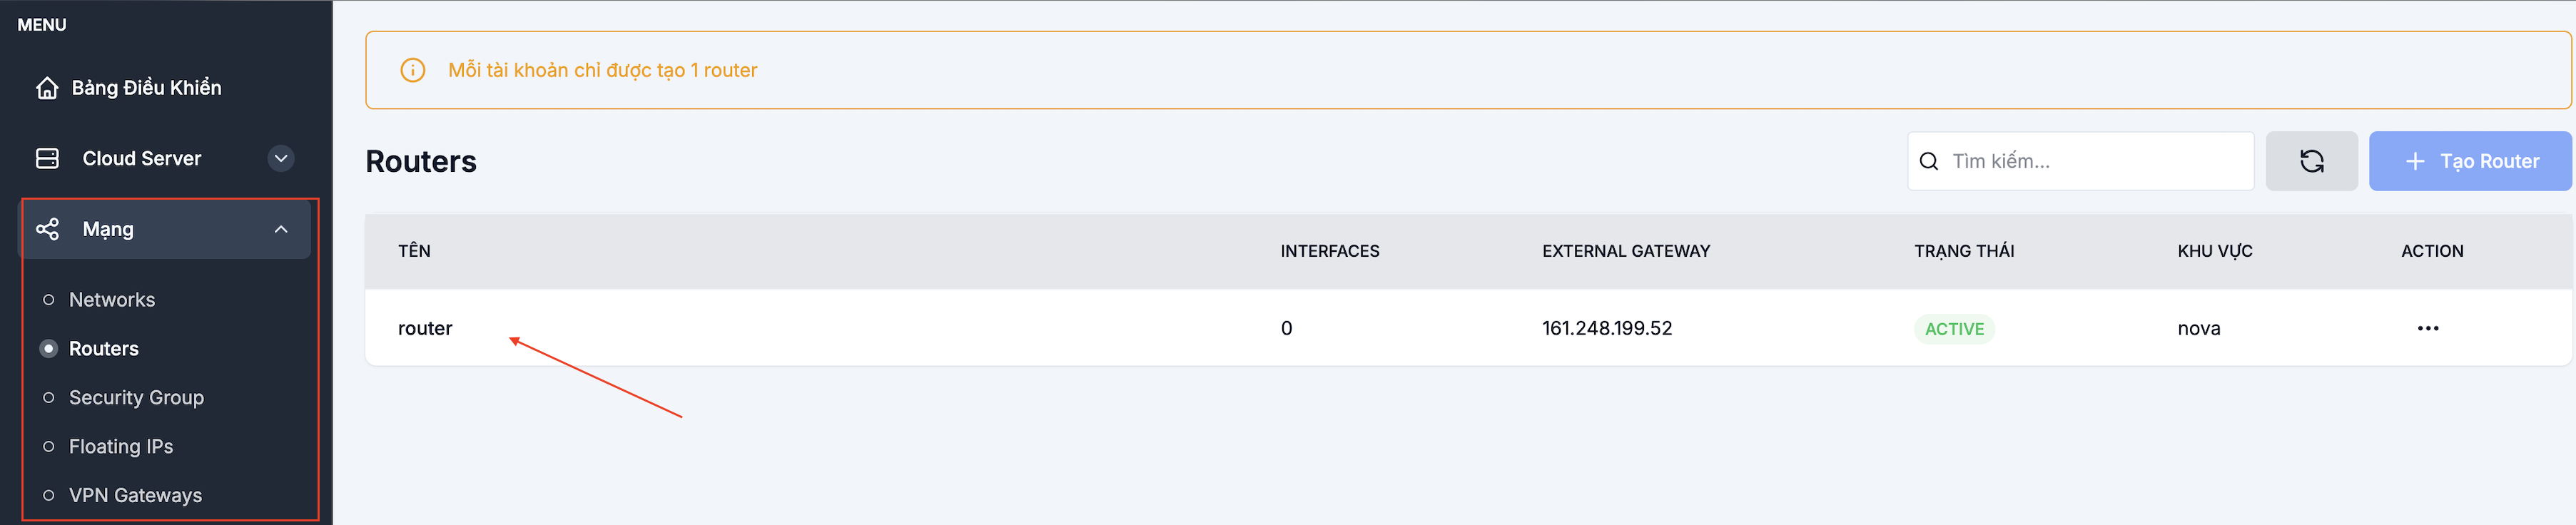
Step 2. Enable the External Gateway
On the Overview tab, flip the External Gateway toggle to On, then pick the External Network from the LANIT pool.
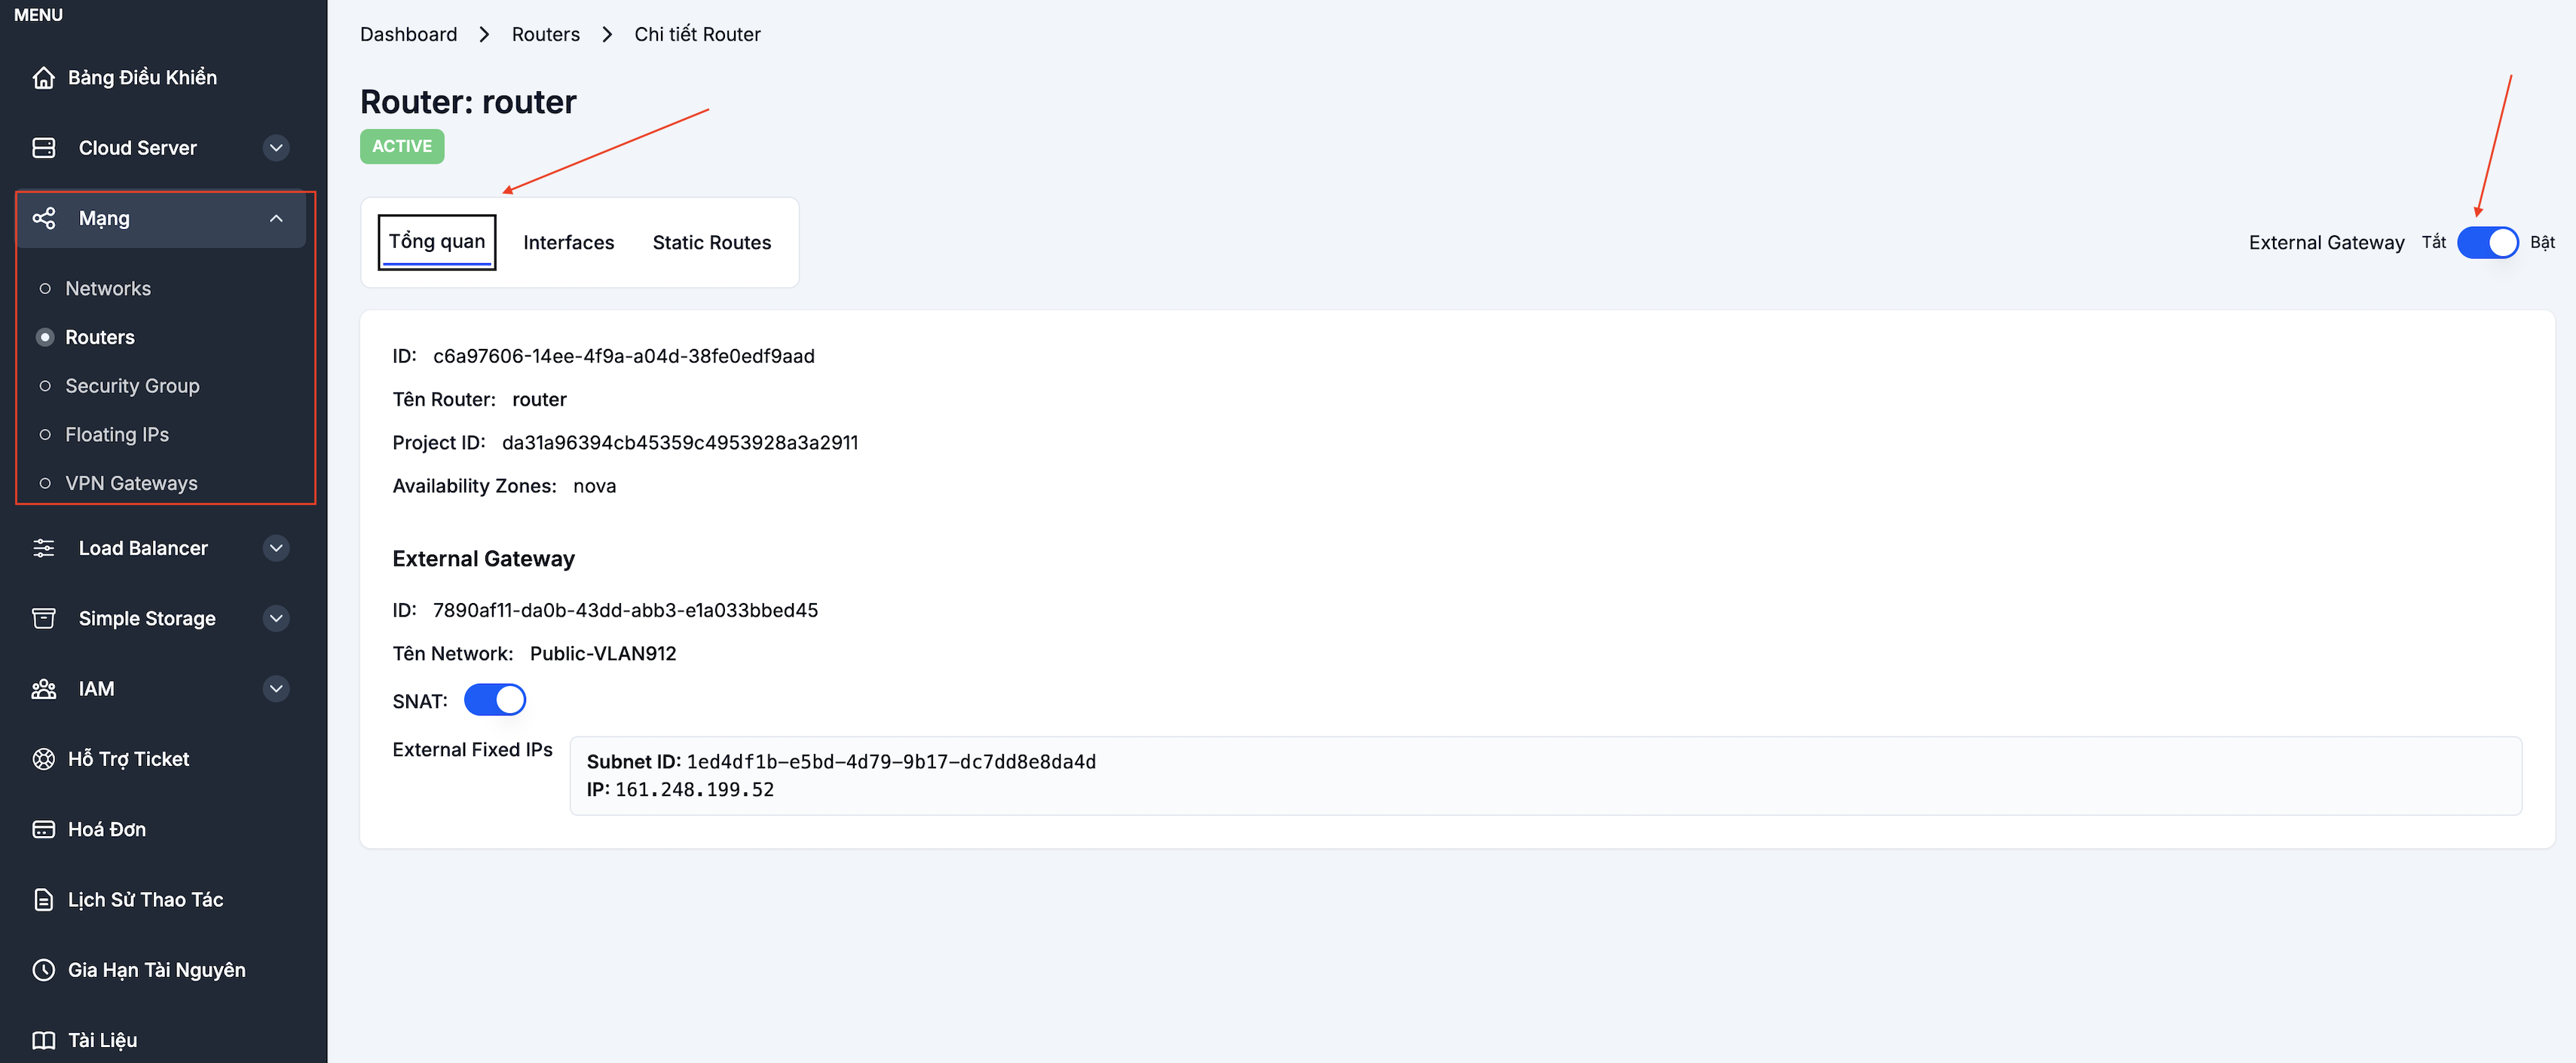
Once enabled, the EXTERNAL GATEWAY column in the Routers list shows the Router's public IP.
Manage Interfaces
An Interface connects the Router to a Subnet — that Subnet "joins" the Router for routing.
Add an Interface
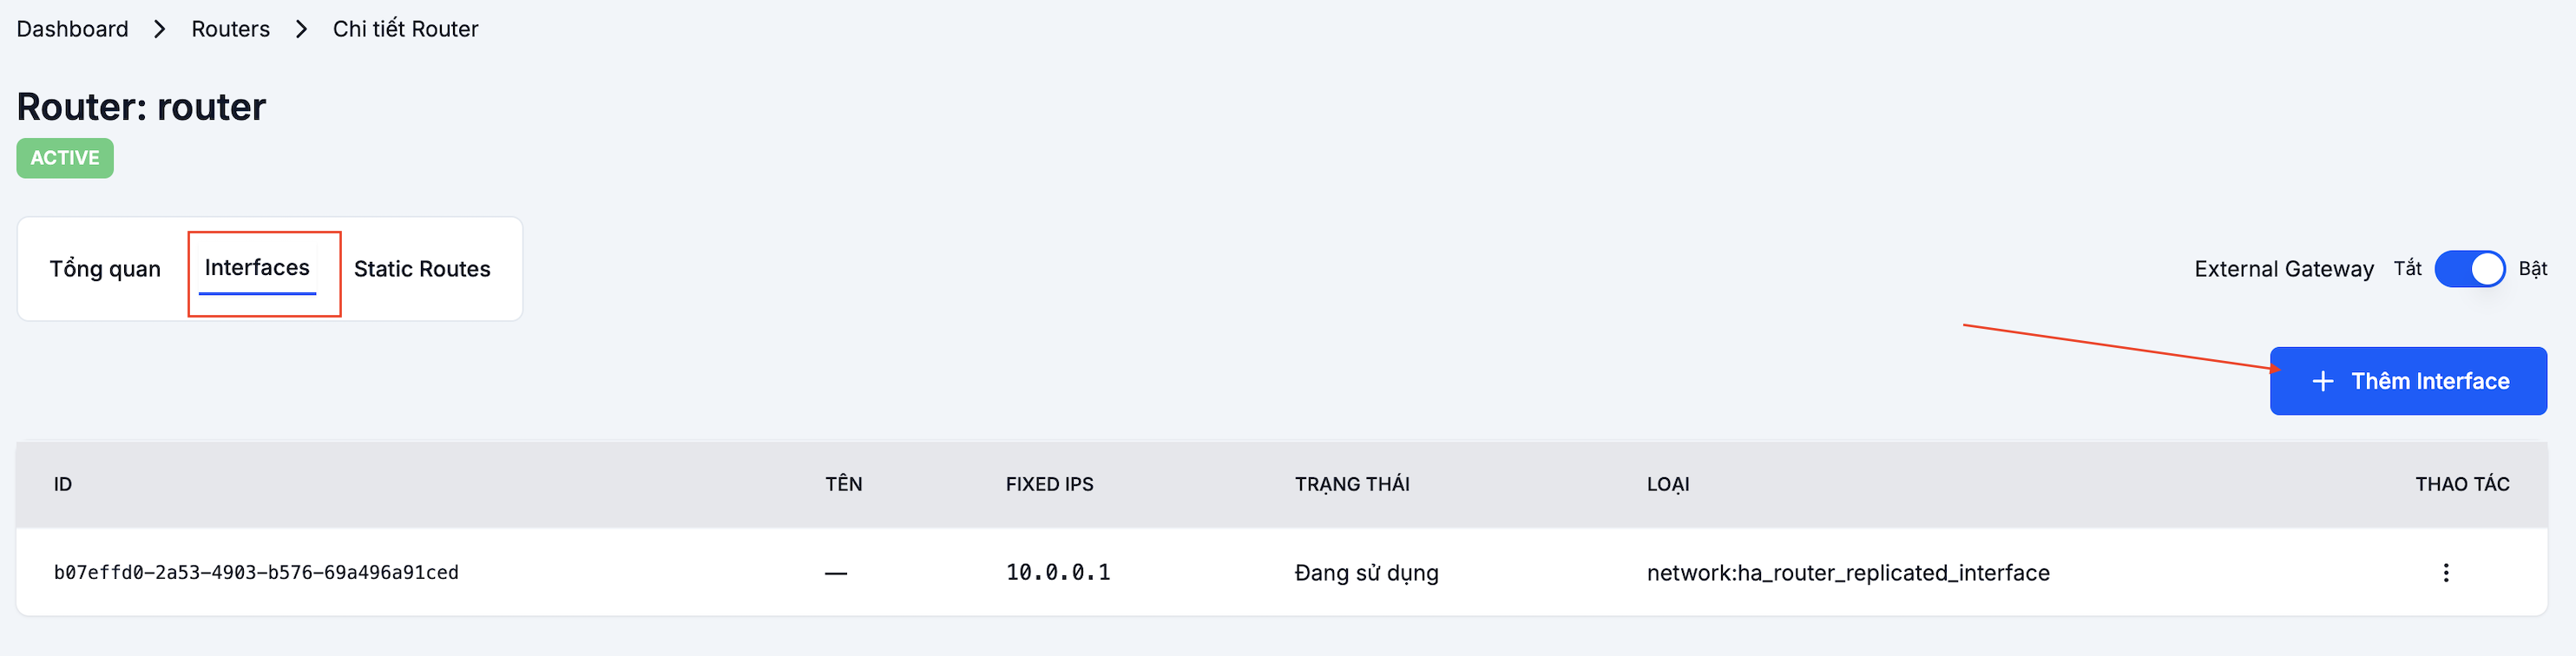
On the Router's Interfaces tab → click + Add Interface.
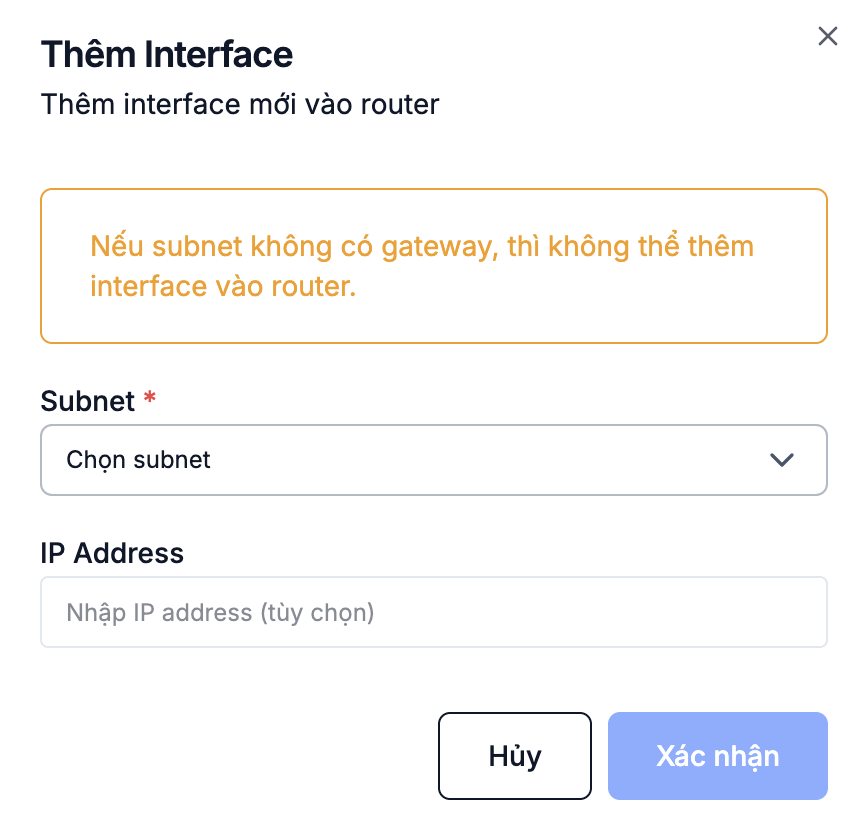
| Field | Meaning |
|---|---|
| Subnet | The Subnet to connect to the Router |
| IP Address (optional) | The Router's IP on that Subnet. Leave empty to use the Subnet's default gateway |
Click Add.
Remove an Interface
On the Interfaces tab, click ⋯ next to the Interface → Remove Interface.
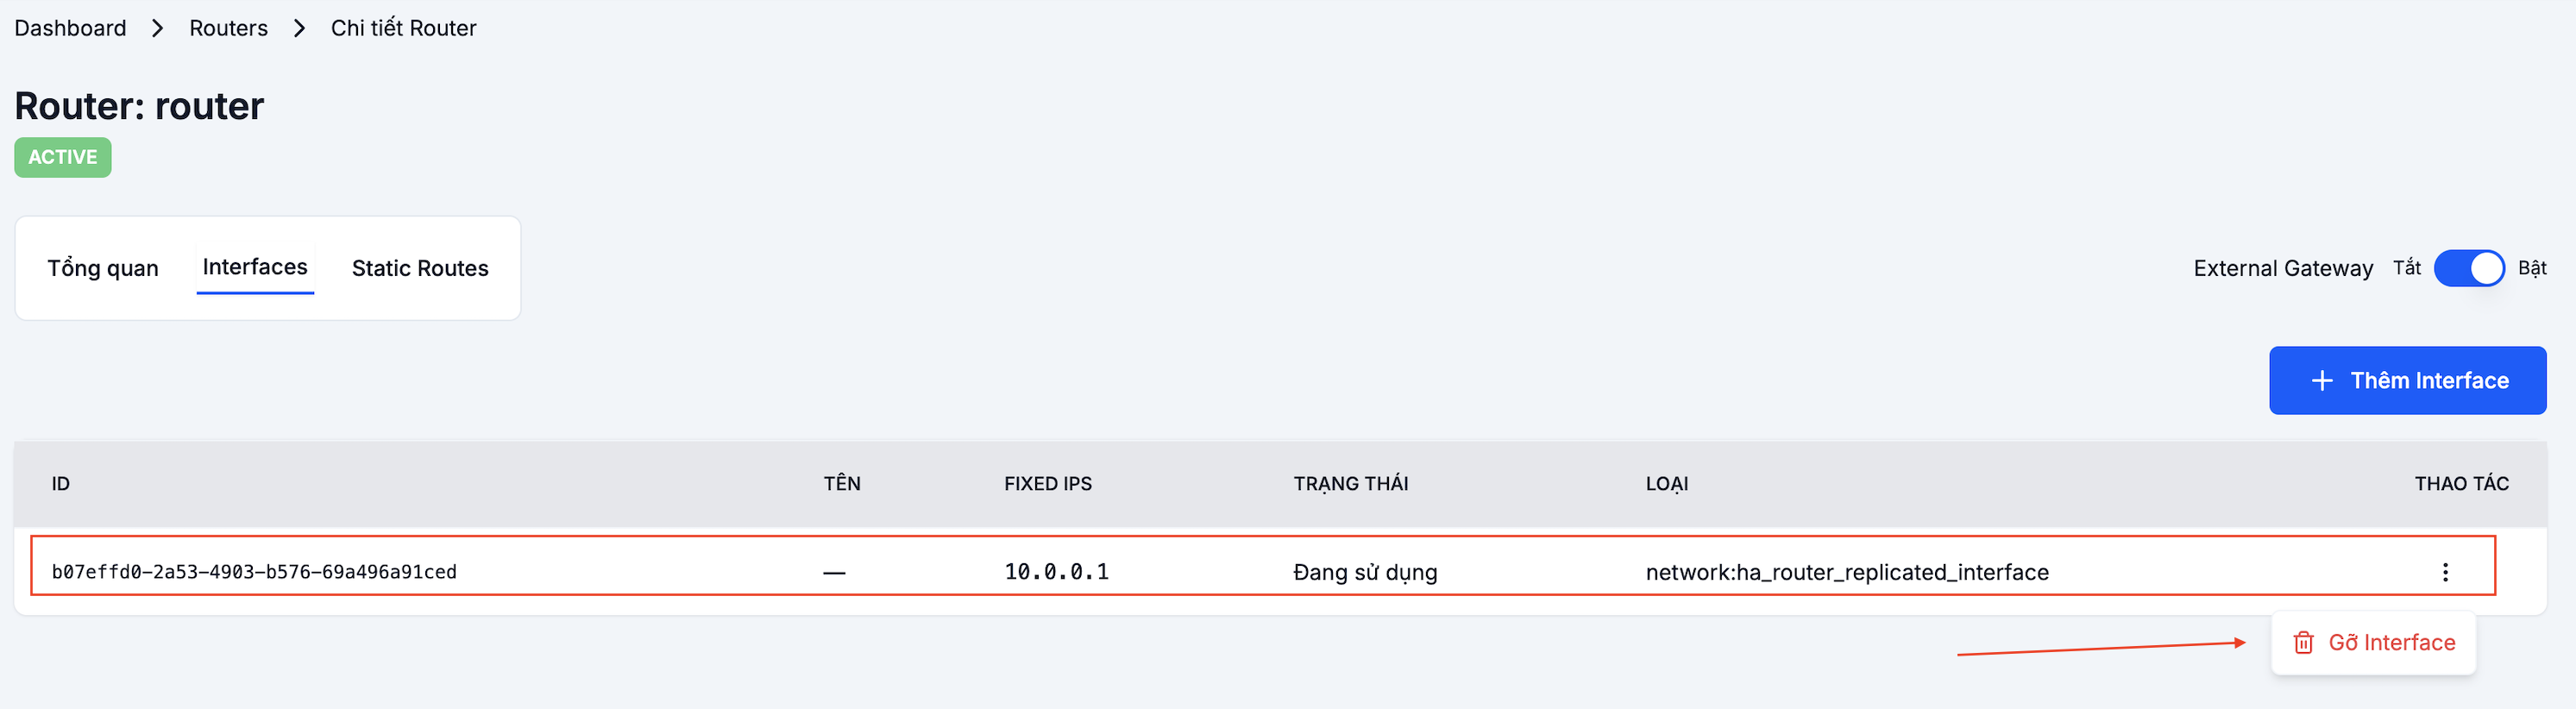
Confirm in the dialog.

A Subnet removed from the Router loses Internet access and access to other Subnets. VMs in that Subnet can only talk inside the Subnet.
Static Routes
A Static Route directs traffic for a specific IP range through a chosen next-hop — useful when:
- Connecting to a site-to-site VPN to an on-premise network.
- Routing to a private internal network outside the default topology.
- Overriding the default route for a specific IP range.
Add a Static Route
On the Static Routes tab → click + Add Static Route.
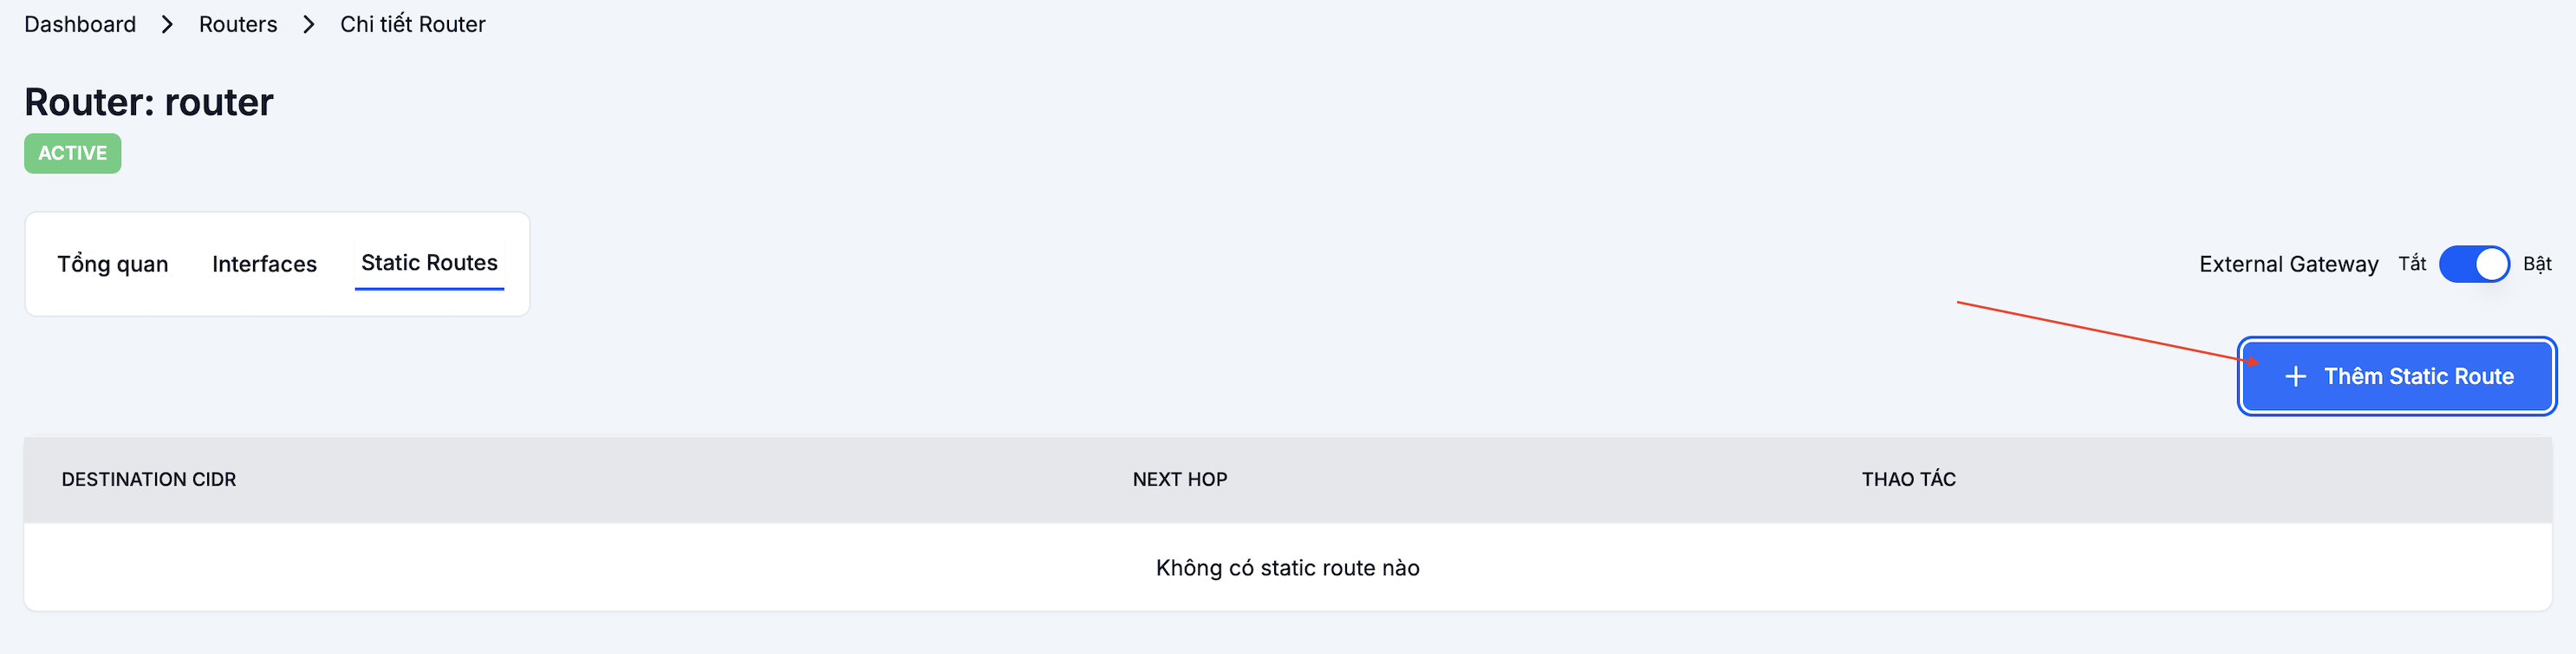
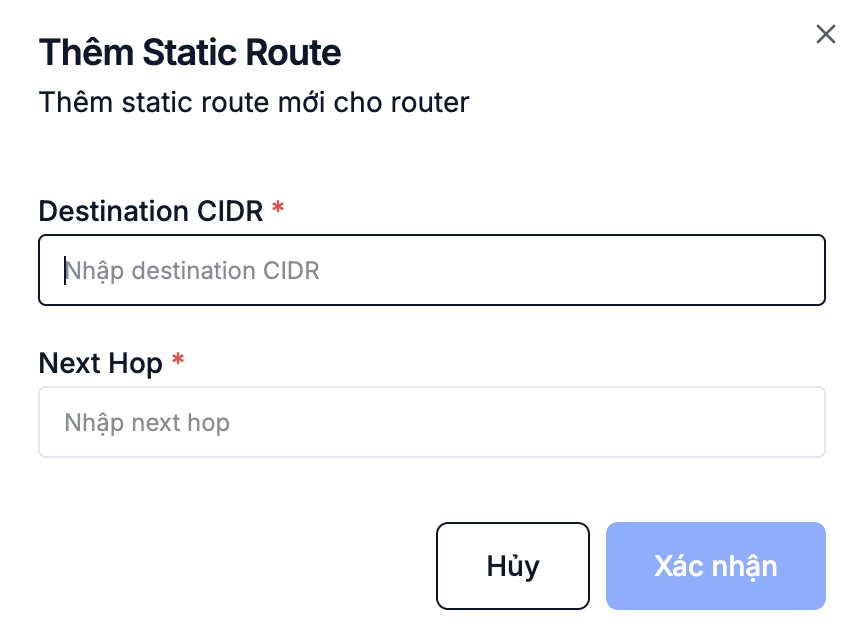
| Field | Meaning | Example |
|---|---|---|
| Destination | The destination CIDR | 192.168.100.0/24 |
| Next Hop | Next-hop IP (usually the VPN gateway's interface) | 10.0.0.254 |
Click Add to apply immediately.
See also
- Network & Subnet — create a Subnet before attaching it to the Router.
- Floating IP — public IPs for VMs sit behind this Router.
- Quick Start — Enable External Gateway — fast path for new users.