Floating IP
A Floating IP is a public IP that you attach flexibly to a VM. Unlike the internal IP (fixed inside the Subnet), a Floating IP:
- Attaches/detaches between VMs in seconds — no restart required.
- Stays with the account — the IP is the same whichever VM it's currently on.
- Required to reach a VM from the Internet (SSH, RDP, HTTP/HTTPS).
When do you need a Floating IP?
| Scenario | Floating IP needed? |
|---|---|
| SSH/RDP into a VM from the Internet | ✓ |
| Serve a public website directly from the VM | ✓ |
| Backend sitting behind a Load Balancer | ✗ (only the LB needs a public IP) |
| Internal VM (database, cache, worker) | ✗ |
| VM that only needs to call out to the Internet (API calls, pull updates) | ✗ — S-NAT through the Router already handles it |
Create a Floating IP
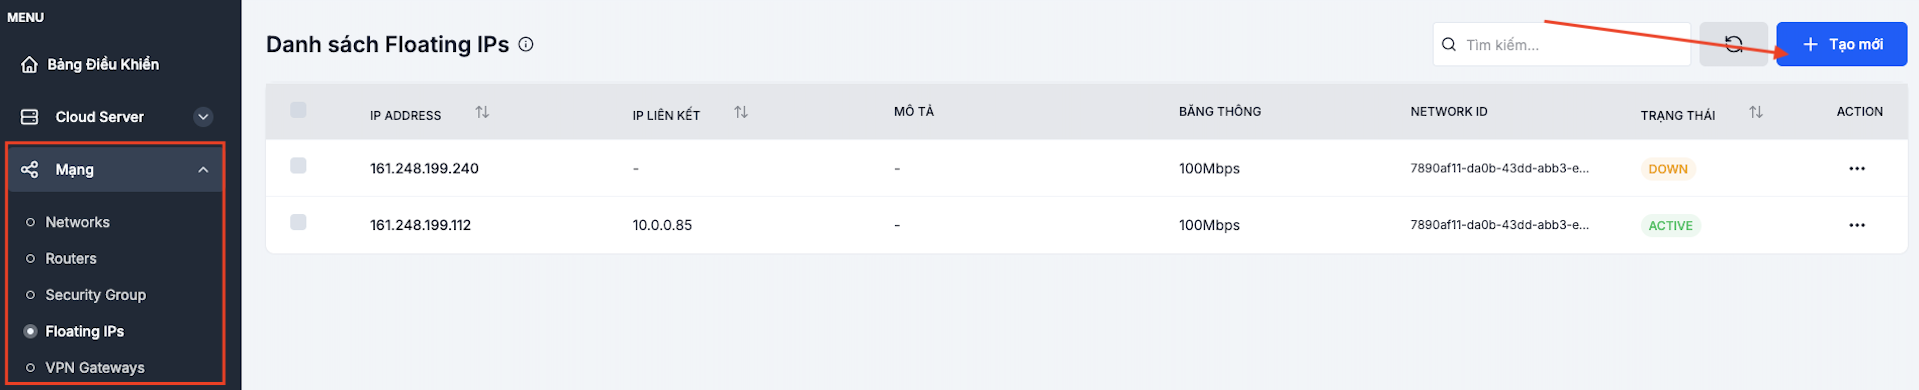
Step 1. Open the Floating IPs page
Go to Network → Floating IPs and click + Create.
Step 2. Configure the Floating IP
| Field | Meaning |
|---|---|
| Pool | Public network — pick the pool already attached to the Router with an External Gateway |
| Bandwidth | The peak bandwidth cap (Mbps) |
| Description (optional) | A memorable note |
| Billing cycle | The billing interval |
Click Create.
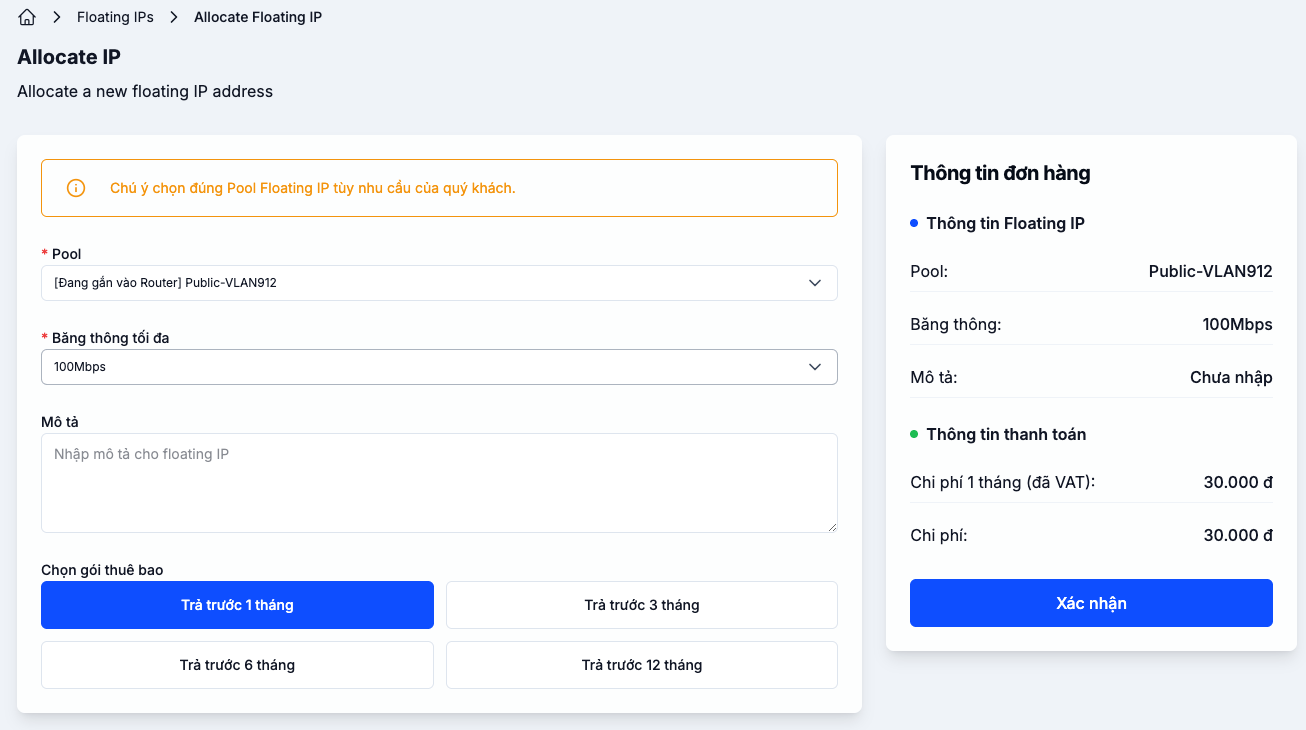
The Floating IP only works when its Pool is attached to a Router with an External Gateway. If you pick the wrong pool, traffic doesn't route — either enable the External Gateway or recreate the Floating IP in the right pool.
Attach a Floating IP to a VM
Step 1. Pick Attach to server
In the Floating IPs list, click ⋯ next to the IP → Attach to server.

Step 2. Pick the VM
Pick the VM and click Attach.
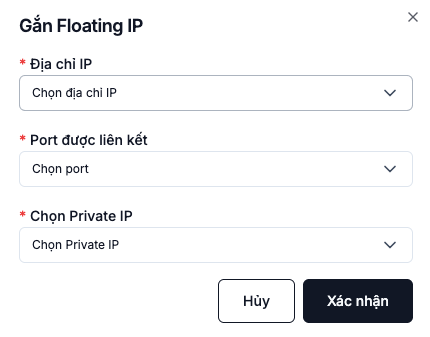
The Floating IP becomes active immediately. Test with ping / ssh from your local machine.
Change the bandwidth
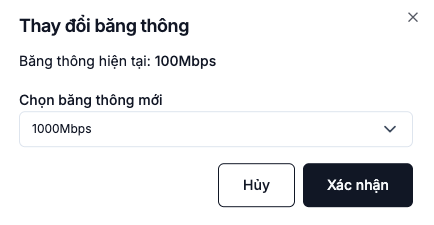
When your bandwidth needs change, raise or lower the cap without detaching.
Click ⋯ next to the IP → Change bandwidth.

Pick the new tier and click Confirm.
Detach a Floating IP
Click ⋯ next to the IP → Detach from server.

The Floating IP returns to Unassigned, ready to be attached to another VM. Don't delete the IP — it keeps billing until it's fully released.
When refreshing a VM but you want to keep the same public IP (for DNS, third-party ACLs), just detach from the old VM → attach to the new VM. Downtime is only the rebind window.
See also
- Router management — the Router needs an External Gateway for Floating IPs to work.
- Security Group — open the right ports so inbound traffic reaches the VM.
- SSH/RDP — use the Floating IP to sign in to the VM.