Last updated on
Create a volume
A volume is block storage with its own lifecycle. You can attach it to a VM, detach and move it to another VM, snapshot it on its own, and grow its capacity — all without touching the system disk.
When to create a new volume?
- Add capacity to a VM without resizing the system disk.
- Separate data (database, logs, uploads) from the system disk to simplify backup and restore.
- Migrate data between VMs by detaching and reattaching the volume.
- Boot from a snapshot — restore older data into a new volume.
Steps
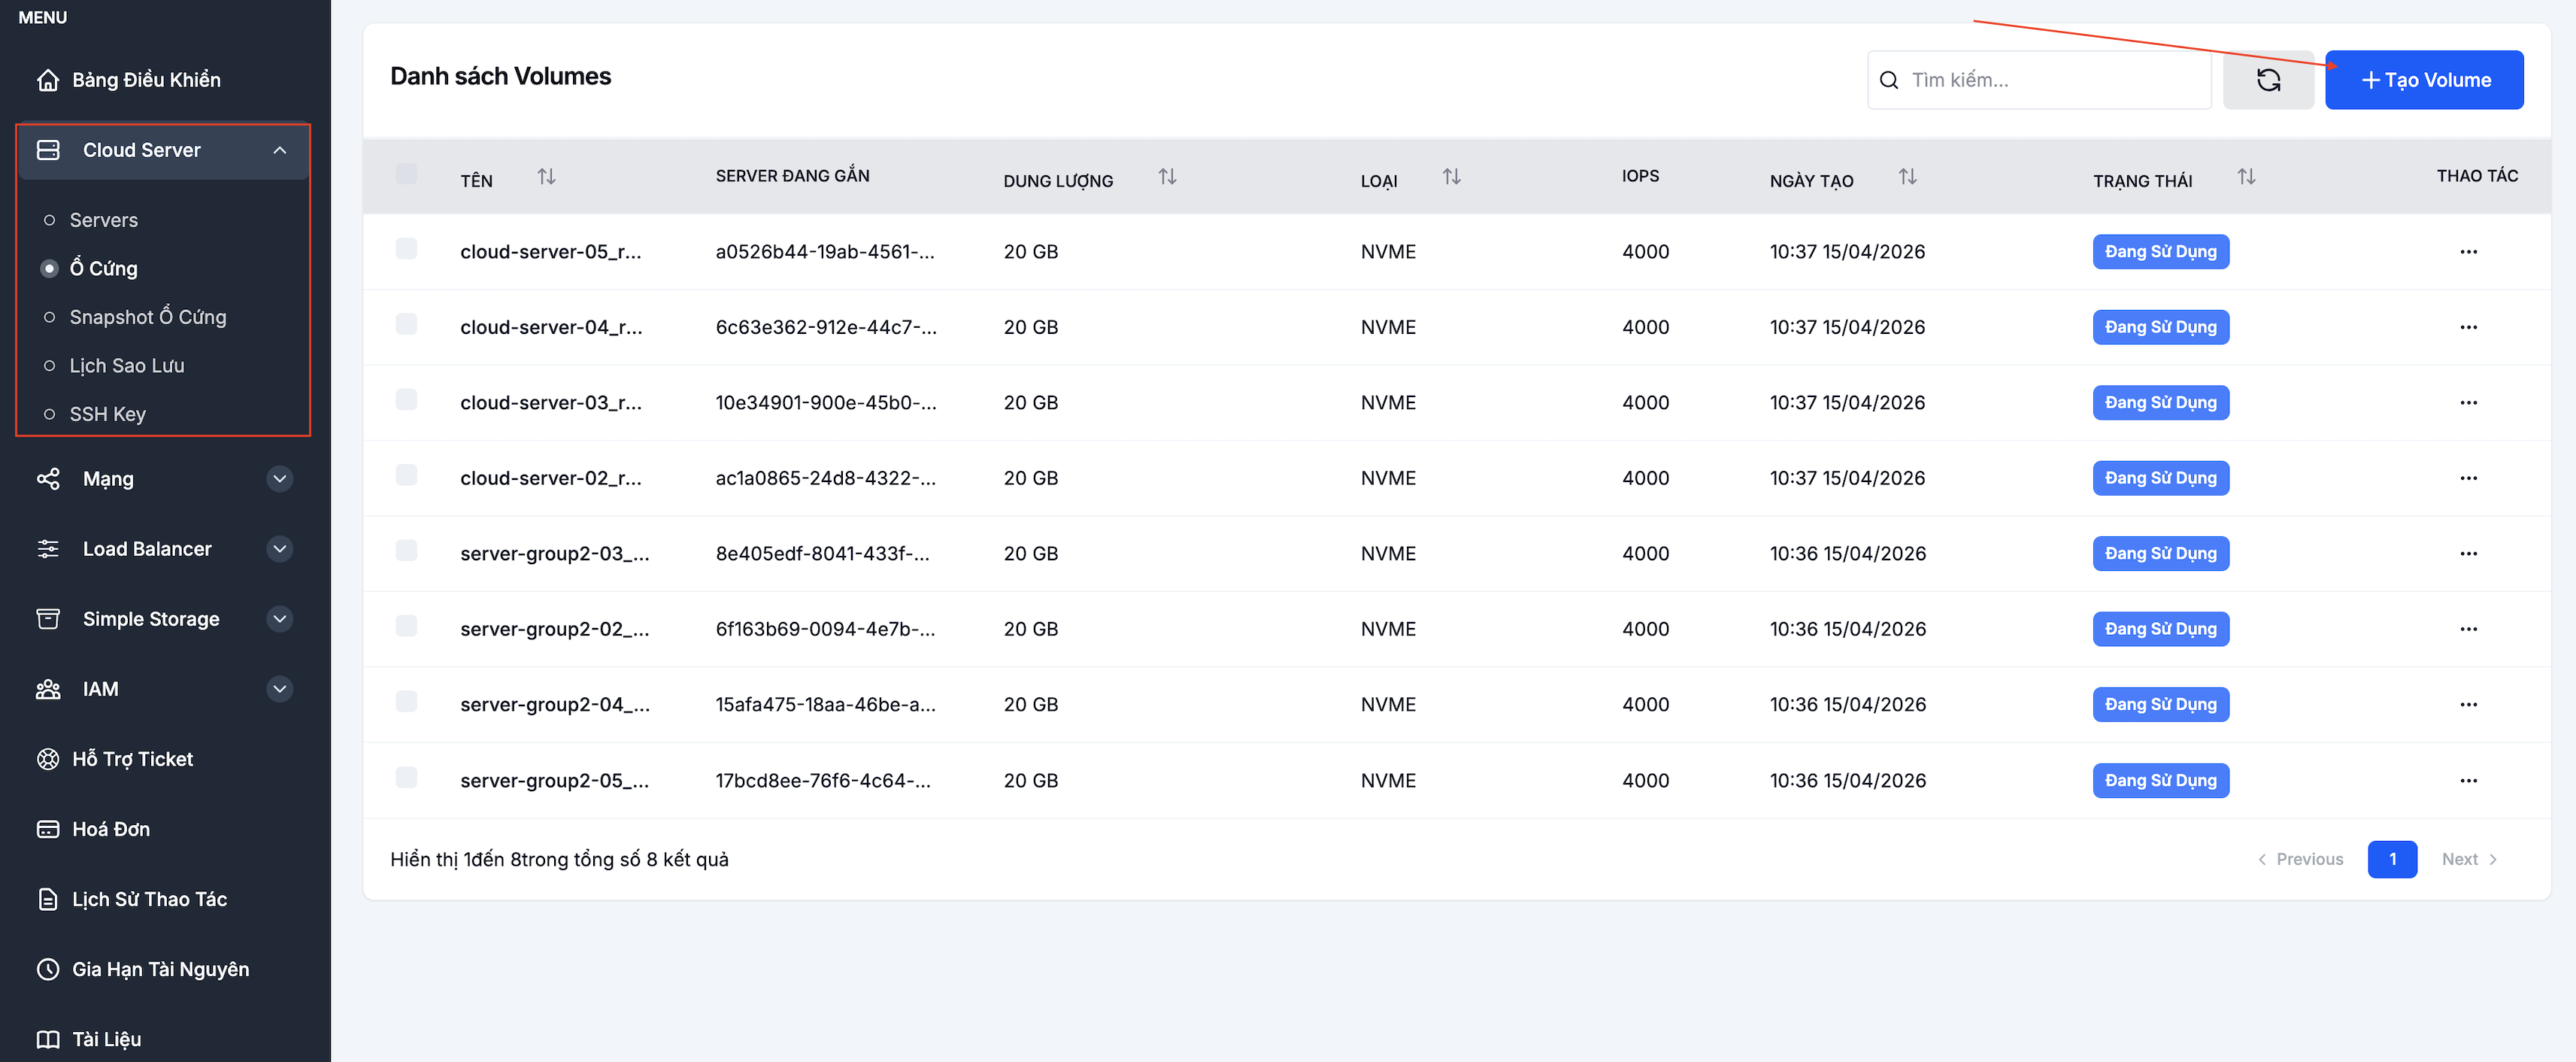
Step 1. Open the Volumes page
Go to Cloud Server → Ổ Cứng and click Tạo volume (Create volume).
Step 2. Configure the volume
Fill in the form on the left and watch the estimated cost in the Order summary panel on the right.
| Field | Meaning |
|---|---|
| Nguồn (Source) | Trống (empty) or Từ snapshot (restore from a snapshot) |
| Gắn vào server (Attach to server) (optional) | Pick a VM to attach immediately after creation, or leave empty to attach later |
| Cách tính phí (Billing) | Prepaid by month: 1 / 3 / 6 / 12 — longer cycles get a discount |
| Loại ổ cứng (Disk type) | NVME (IOPS) |
| IOPS | The IOPS level for the volume (e.g. 4000) — higher IOPS, higher performance |
| Dung lượng (GB) (Size) | 10 GB minimum, 500 GB maximum |
| Tên volume (Volume name) | A memorable name — include the role (db-data, app-uploads) |
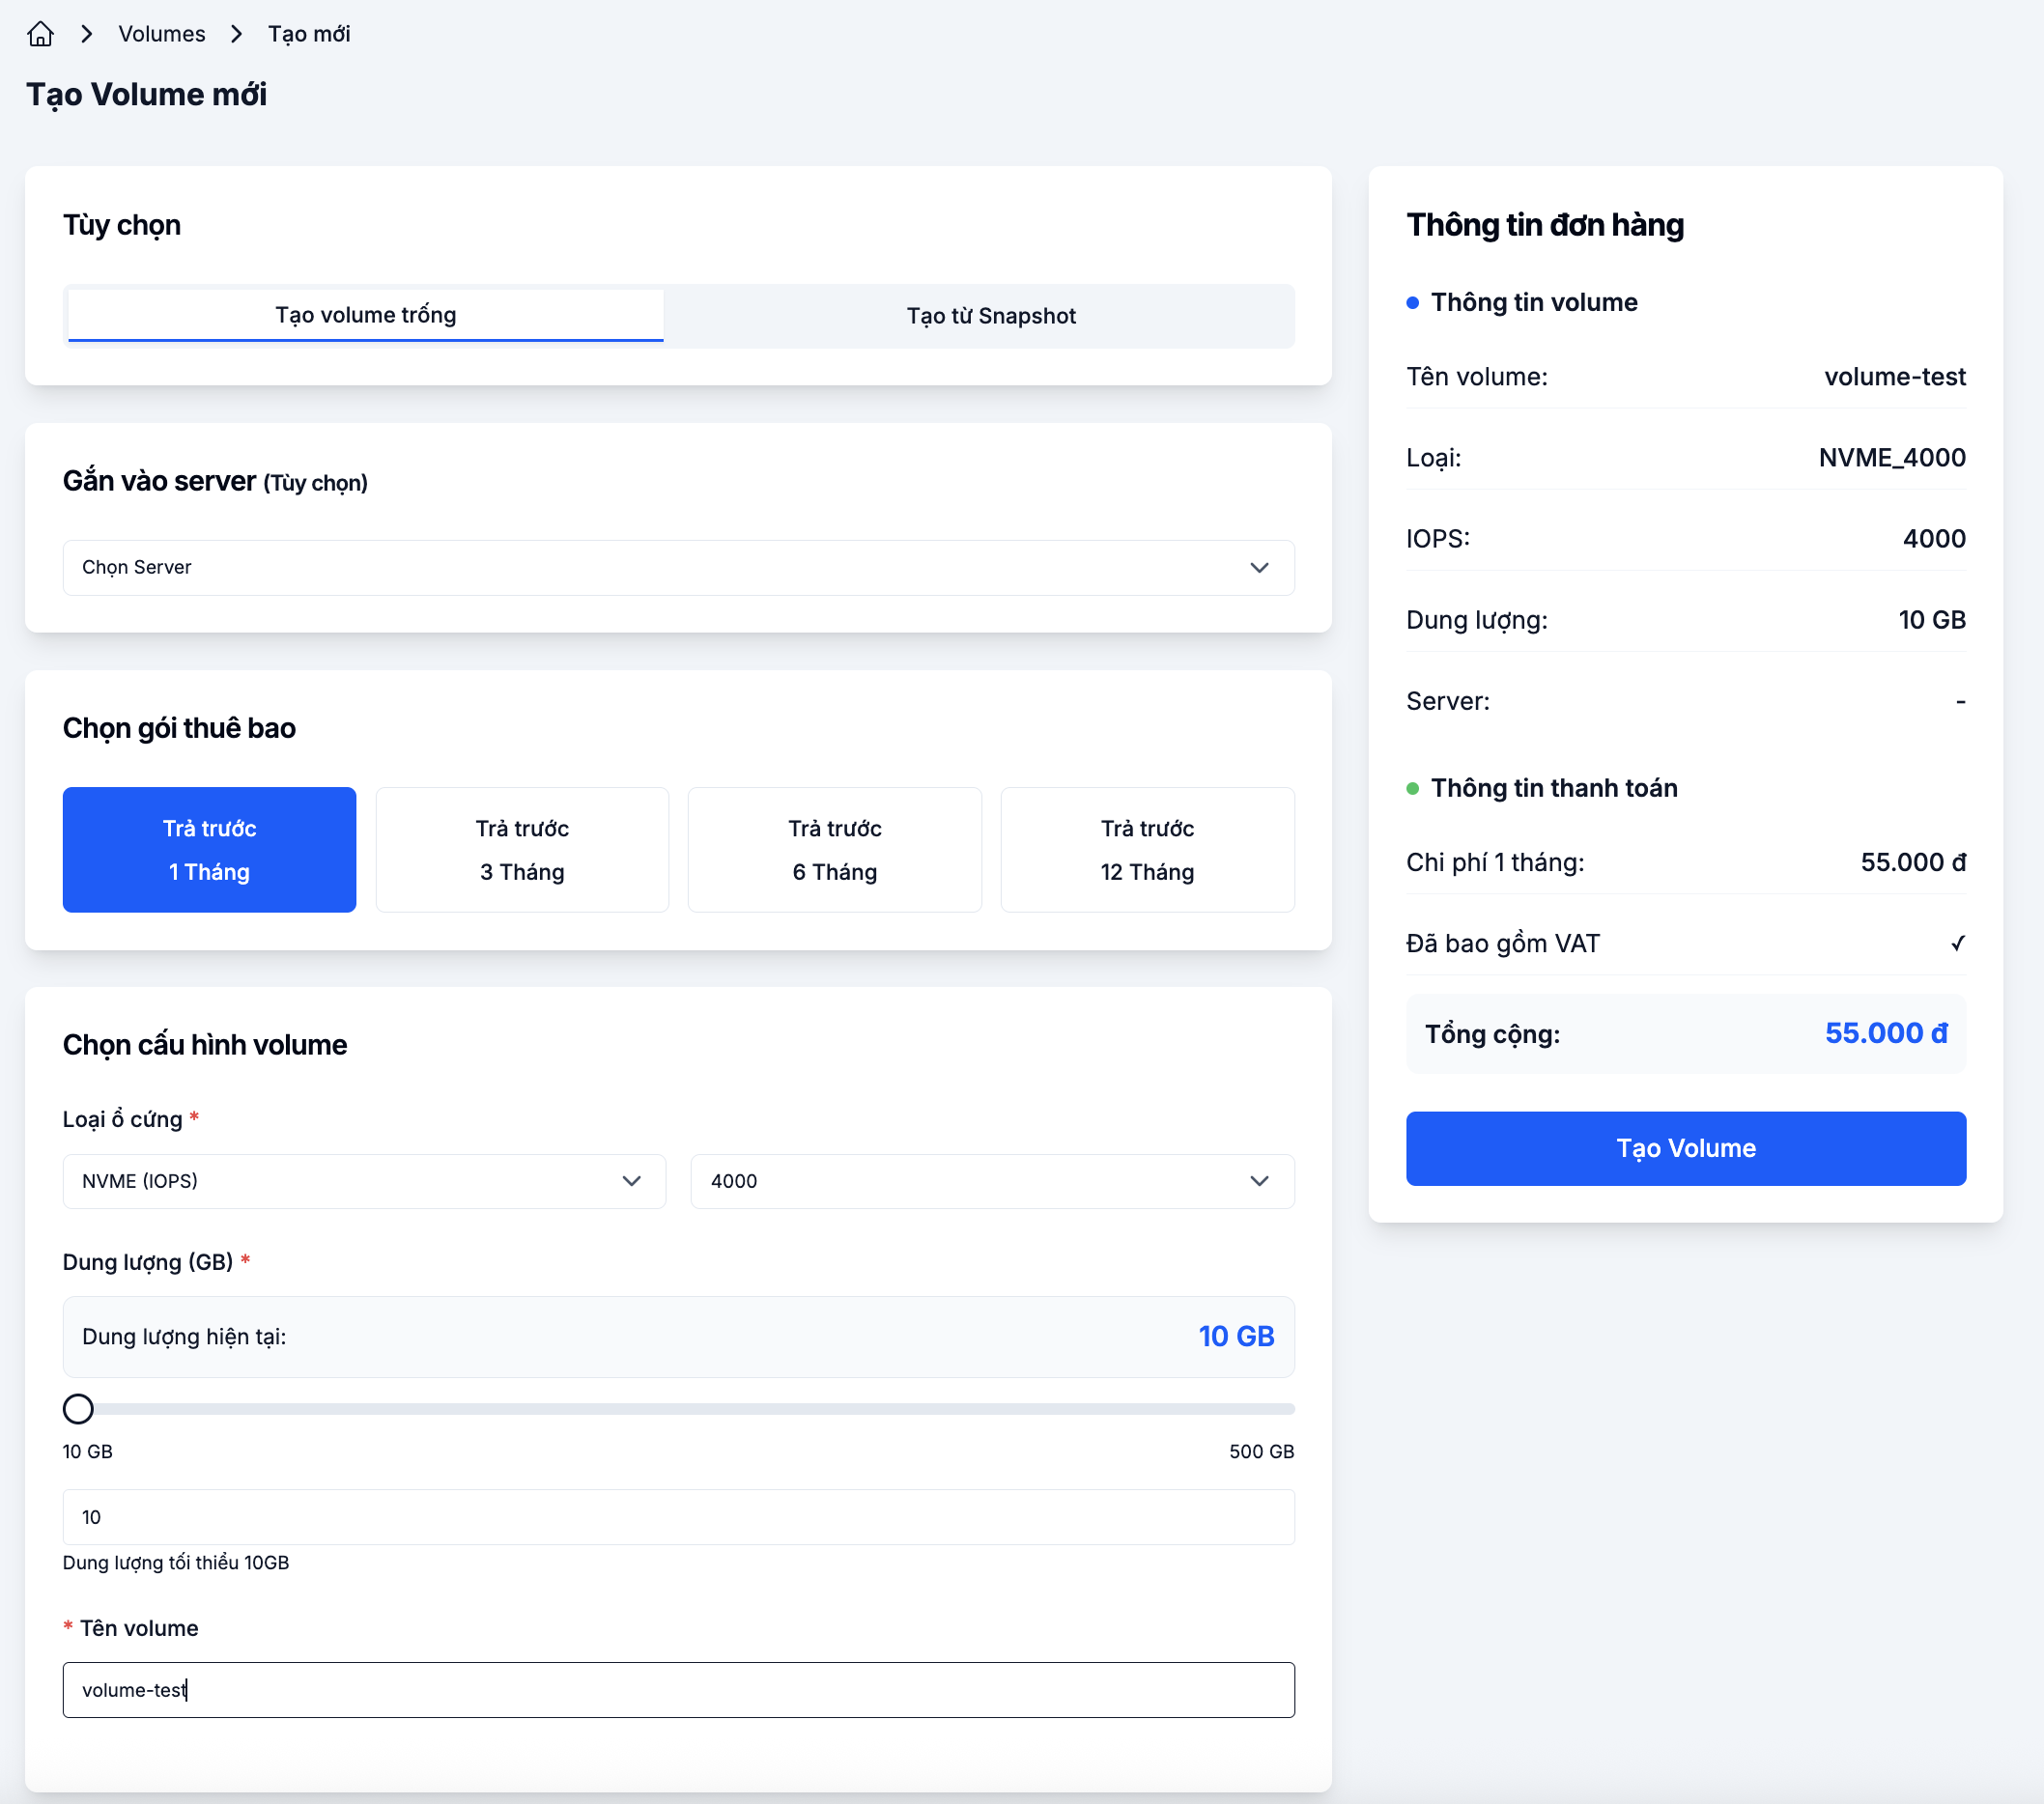
Step 3. Create
Review the cost in the Order summary panel and click Tạo volume. The volume appears in the list with one of these states:
- In use — if you picked a server to attach at step 2.
- Available — if it hasn't been attached yet; you can attach it later.
Next steps
- Attach the volume to a VM — if you didn't pick a server during creation.
- Resize the volume — when you need more capacity.
- Take a Snapshot Volume — back up the volume data.