Resize a volume
You can grow a volume online — no need to detach it from the VM, no data loss. After resizing in the Portal, you still need to grow the partition + filesystem inside the OS for the new capacity to be visible.
Volume size can only grow — it cannot shrink. Plan carefully before confirming so you don't pay for capacity you don't need.
Step 1. Resize in the Portal
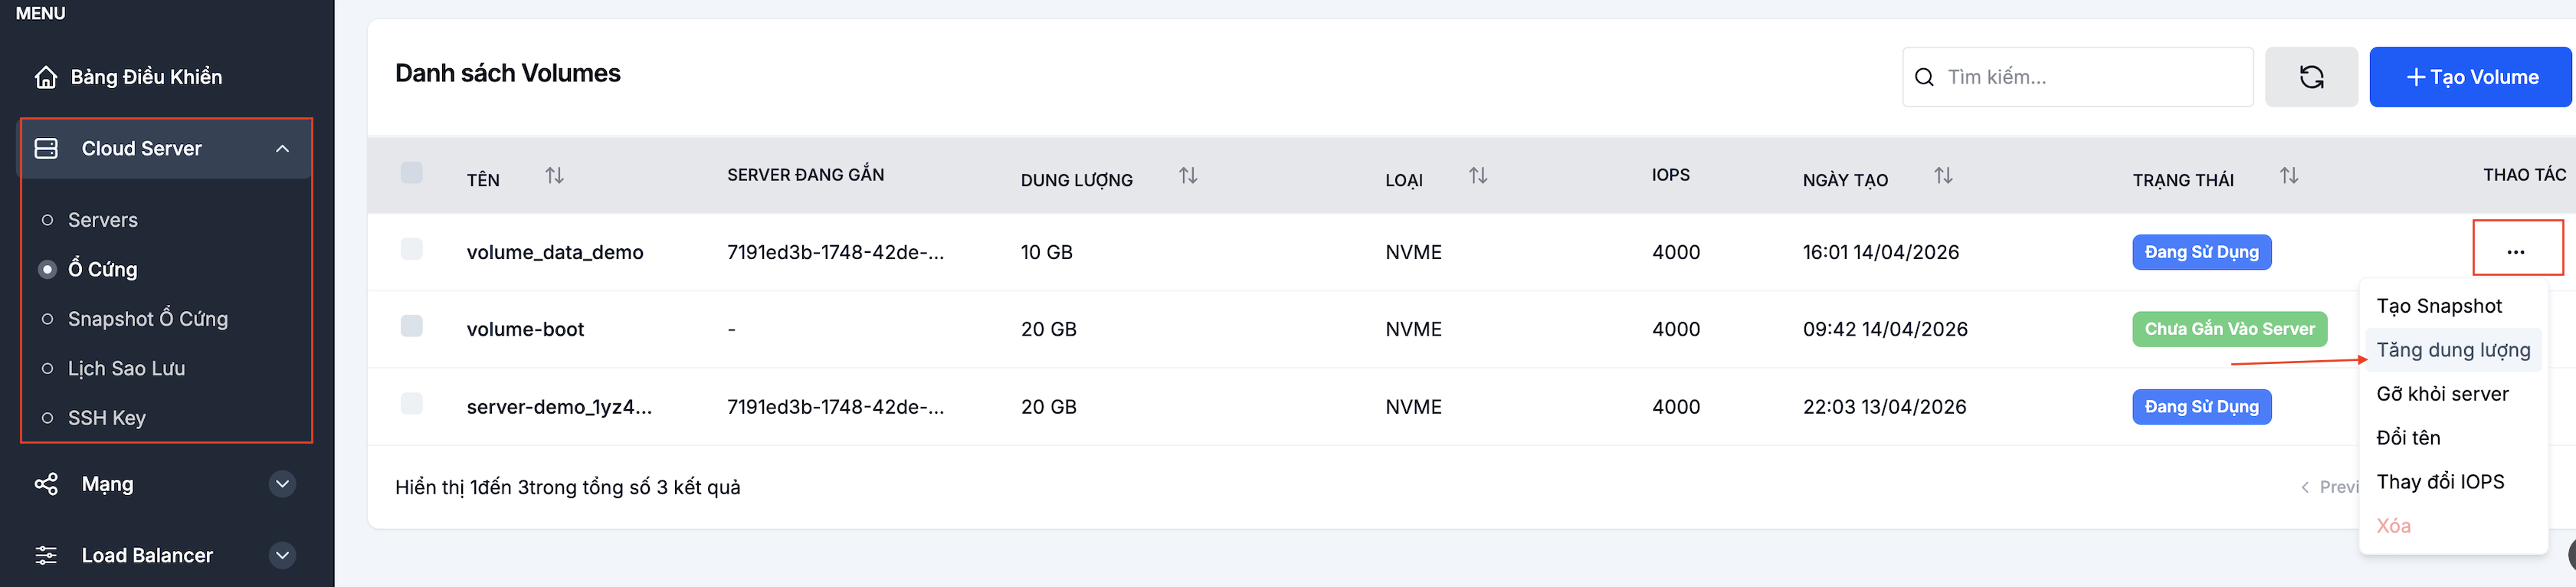
Go to Cloud Server → Volumes, click ⋯ next to the volume → Increase size.
Type the new size (must be larger than the current size) and click Confirm.
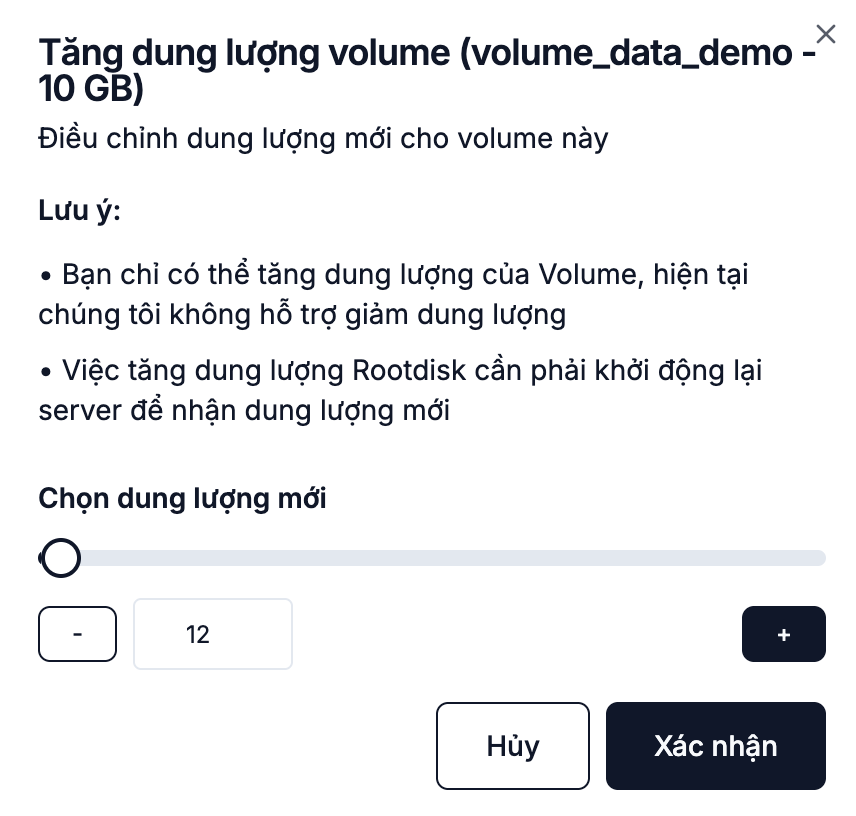
Once the Portal confirms the resize, the block device is larger. The OS does not see the new capacity yet — go to step 2 to make it usable.
Step 2. Grow the partition and filesystem inside the OS
Linux (ext4)
# 1. Confirm the block device is at the new size
lsblk

# 2. Grow the partition (if you use partitions)
sudo growpart /dev/sdb 1

# 3. Grow the ext4 filesystem
sudo resize2fs /dev/sdb1   # or /dev/sdb if you formatted directly on the device

# 4. Verify
df -h /mnt/data
Linux (XFS)
# Grow an XFS filesystem — only requires the volume to be mounted
sudo xfs_growfs /mnt/data

df -h /mnt/data
Windows
- Open Disk Management (
diskmgmt.msc). - Right-click the disk you want to grow → Extend Volume.
- The wizard uses all newly unallocated space. Click Next → Finish.
Before resizing a production volume for the first time, run through the commands on a staging machine so you know the right tools for the filesystem you use (ext4, xfs, btrfs…). Picking the wrong command rarely loses data but eats time to recover.
Notes
- LVM, RAID, encryption: grow the PV/LV or encrypted layer first, before running
resize2fs/xfs_growfs. - Boot volume: can be grown like a data volume — make sure the partition table is supported (
growparthandles GPT and MBR). - Backup: snapshot the volume before resizing if the data matters.