Last updated on

VM Operations

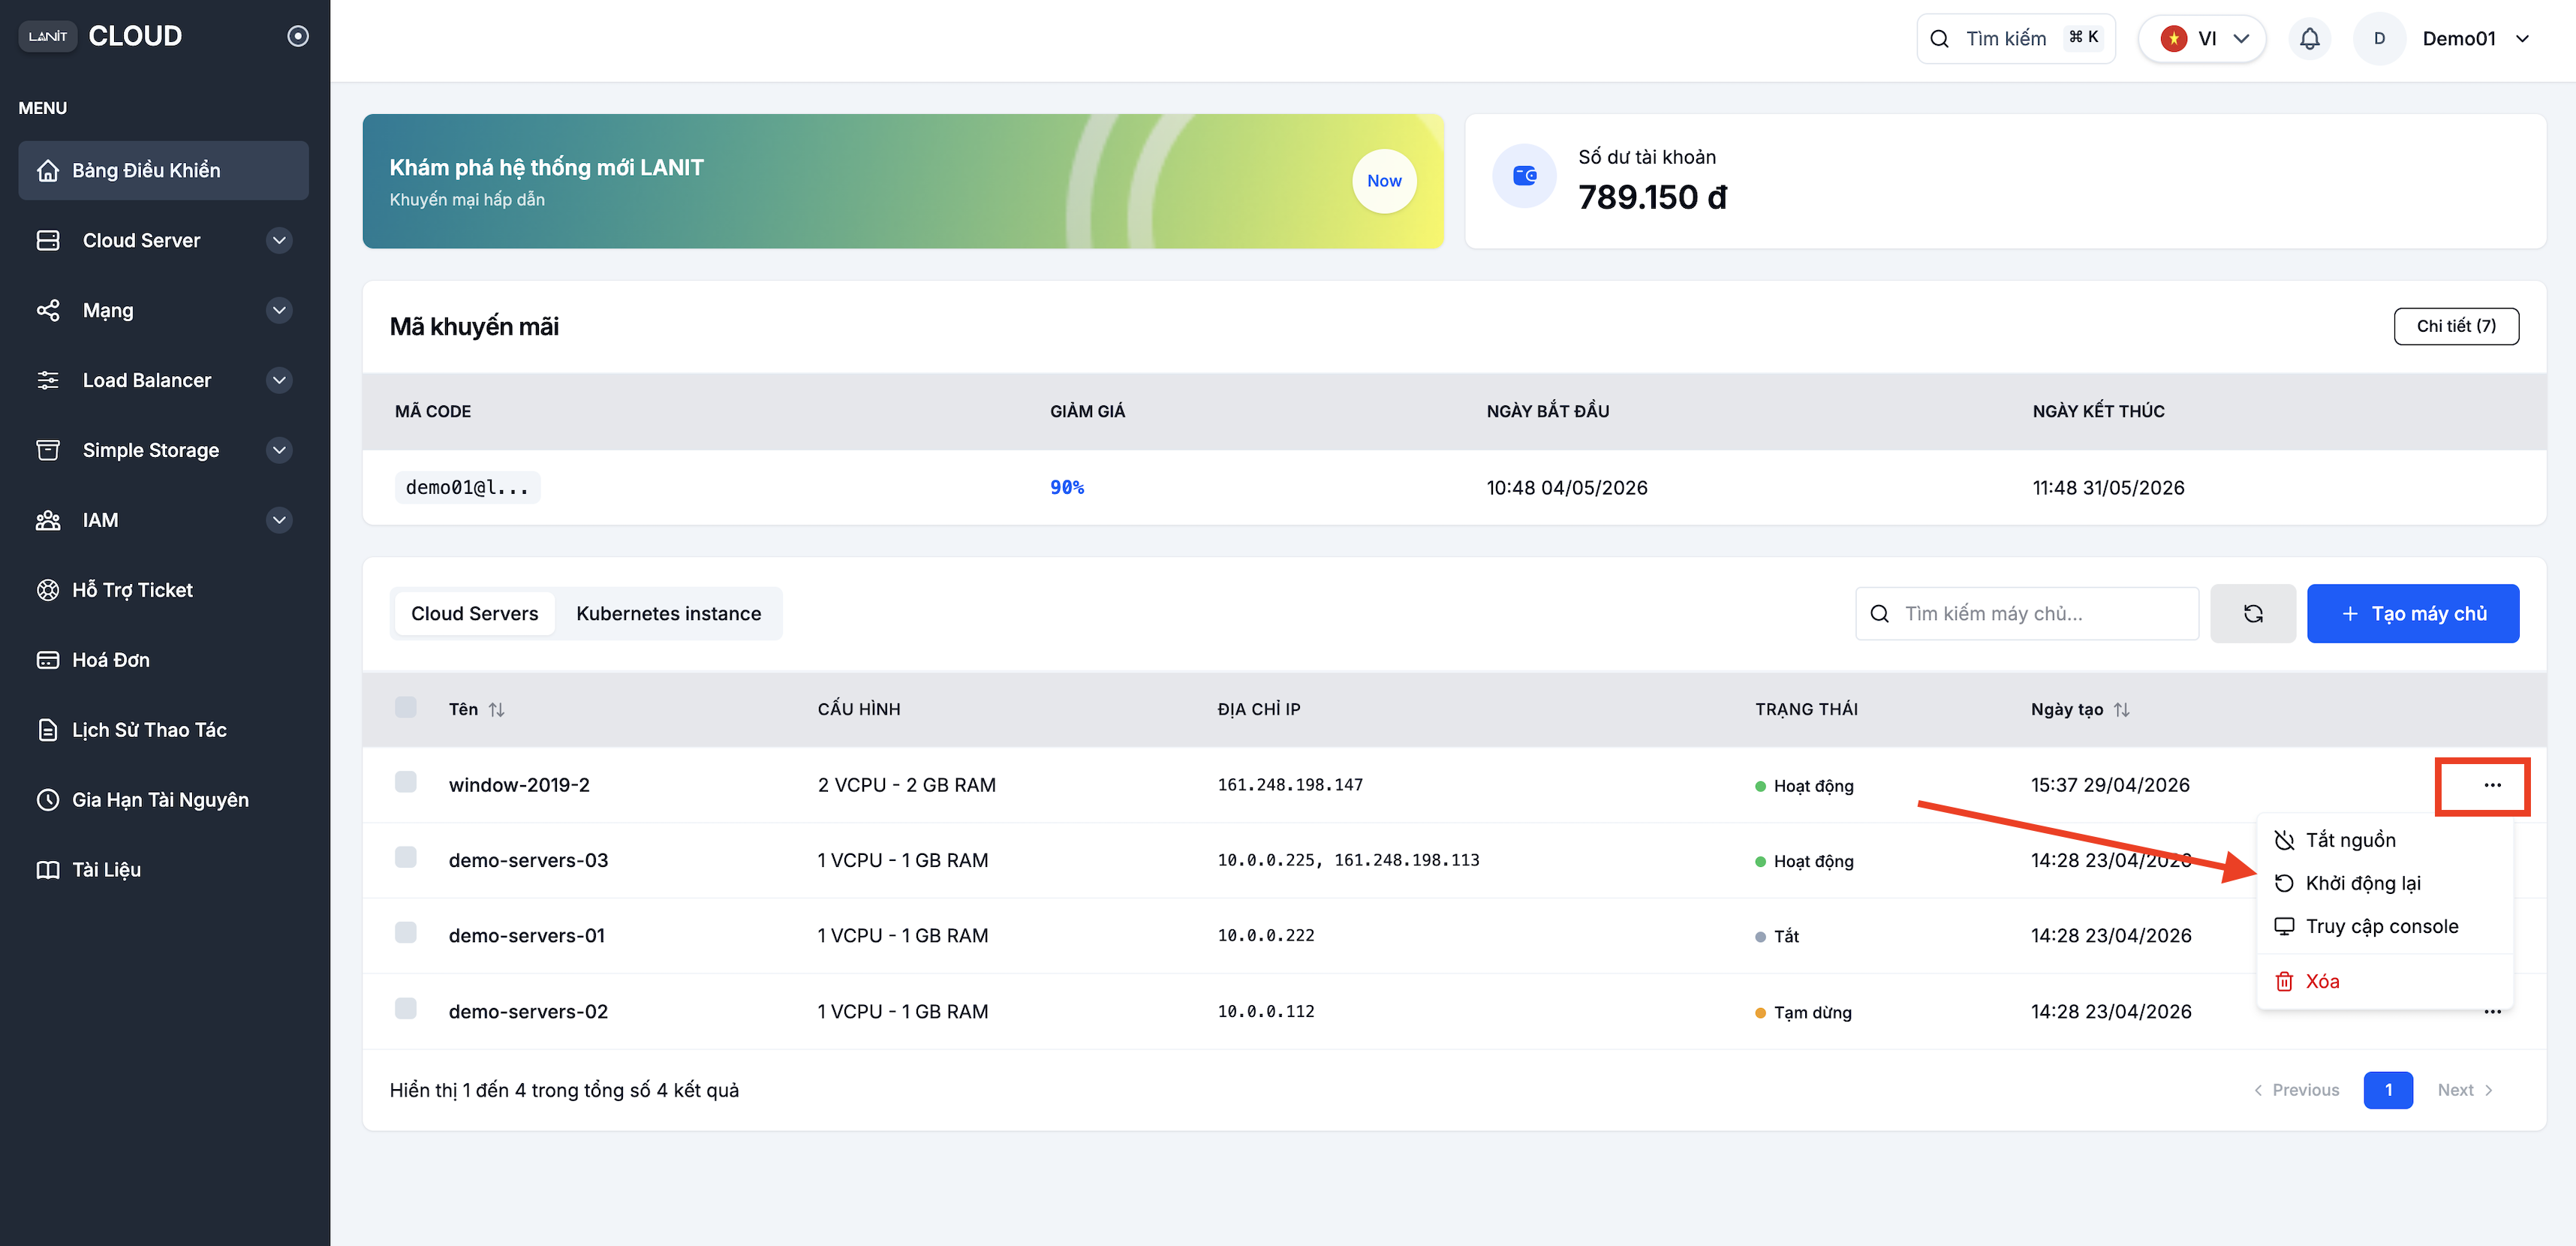
All quick operational actions happen from the Servers list page. Open the ⋯ menu to the right of each VM to see the available actions.
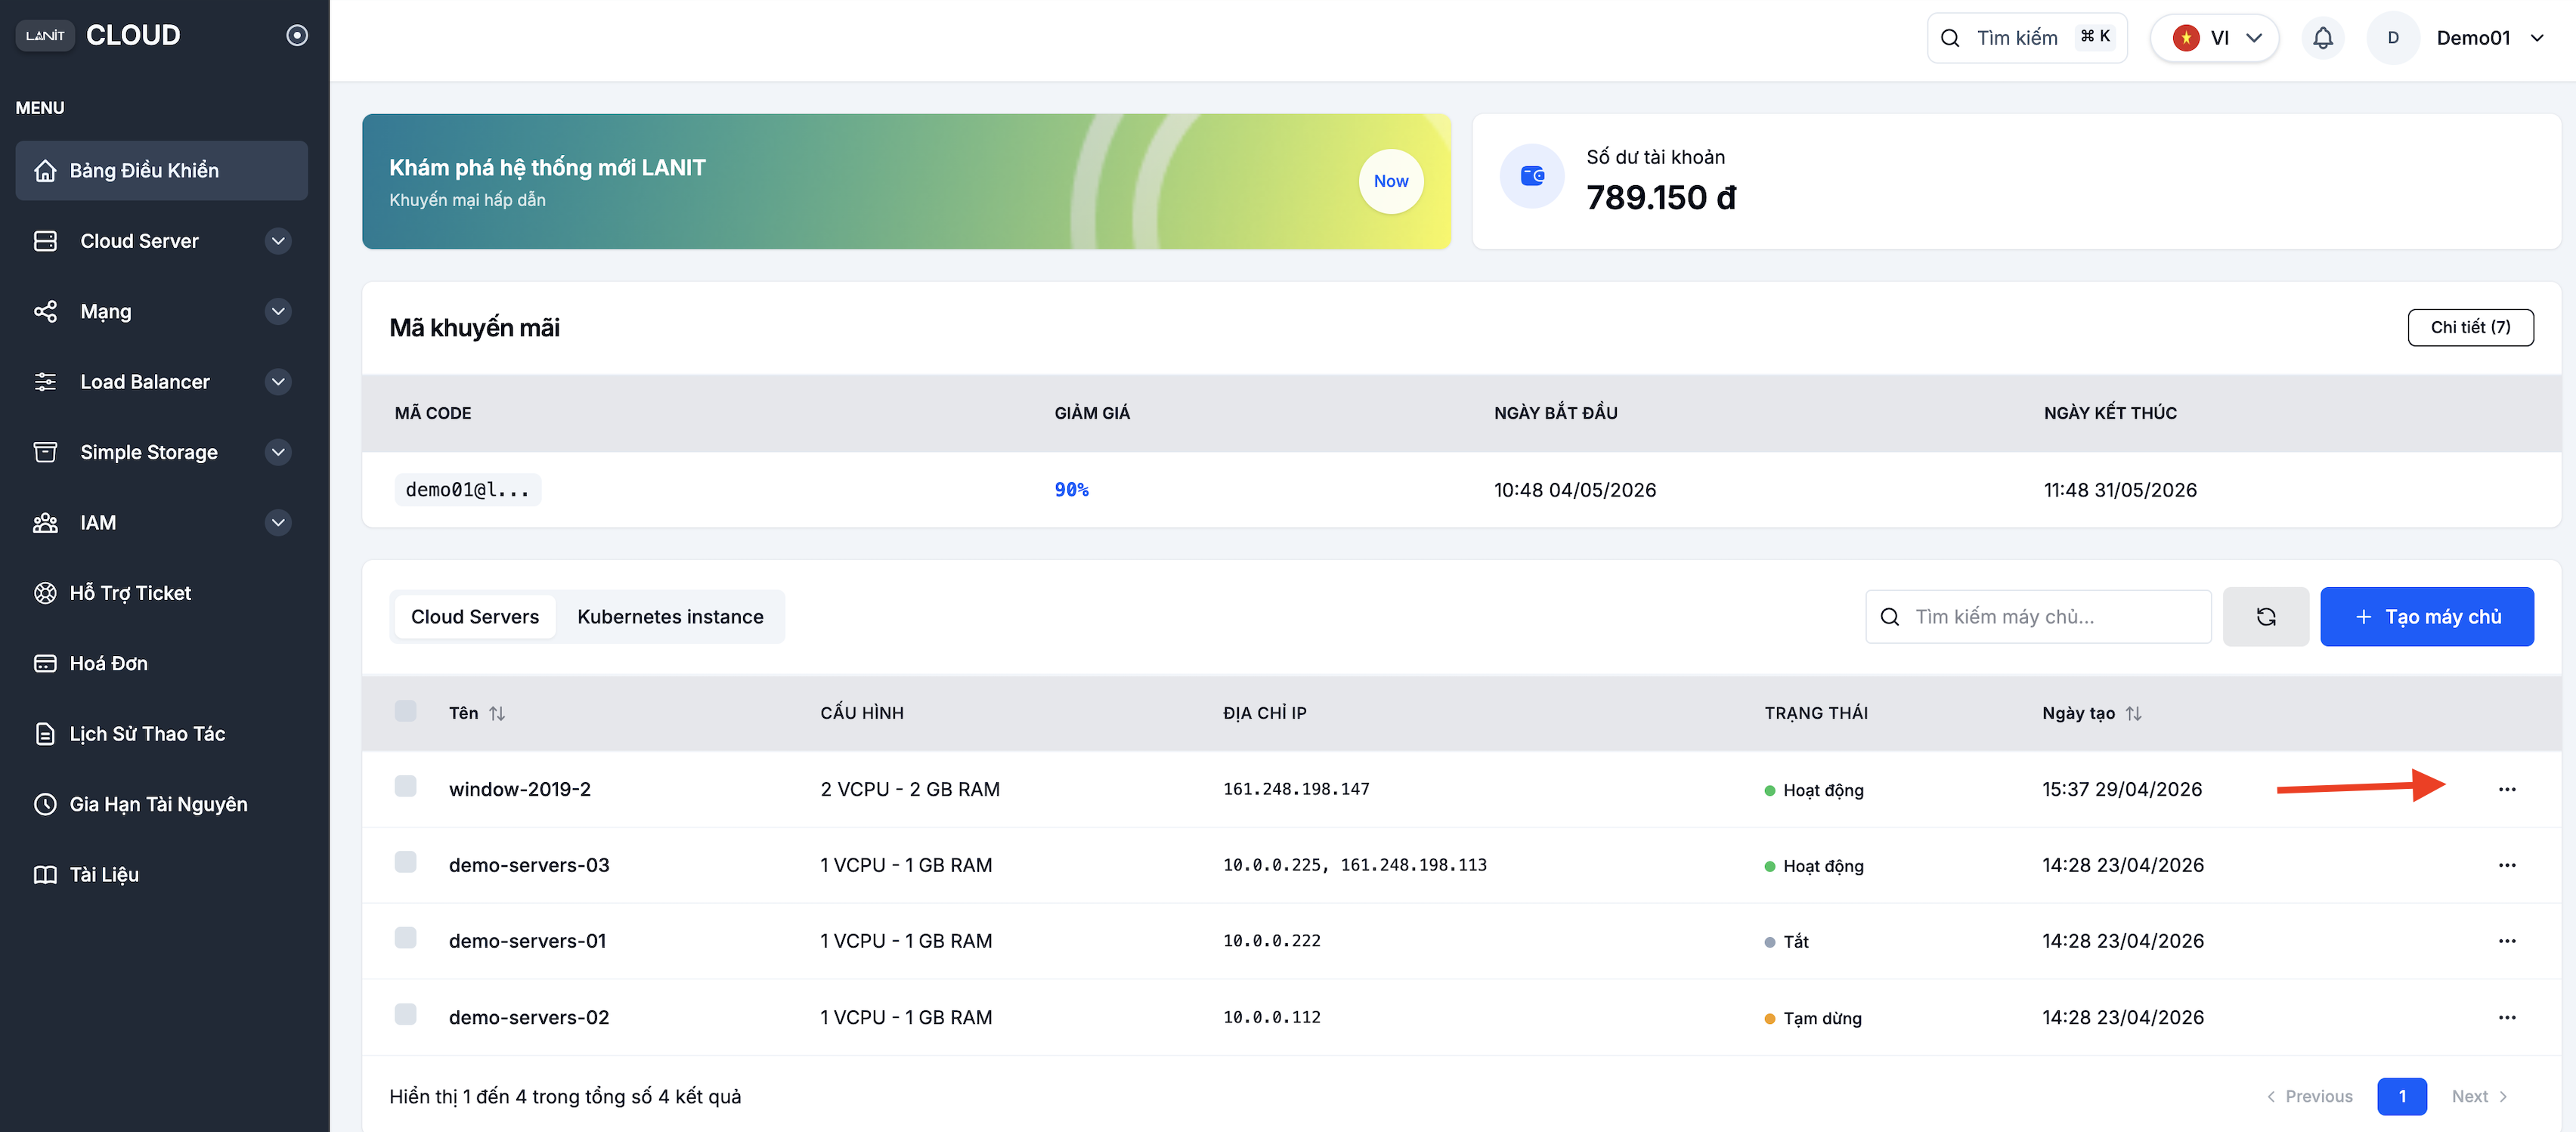
Location of the action menu on a VM row

Which actions appear depends on the VM's current status:

VM statusActions shown
StoppedPower on · Rename · Delete
SuspendedResume · Rename · Delete
Any other status (Active, Building, Error…)Power off · Reboot · Access console · Rename · Delete

Action menu expanded with the available options

Action details

  • Access console — opens the VM's VNC console in a new browser tab. Only shown when the VM is not Stopped or Suspended.

  • Power on — only shown when the VM is Stopped. The portal asks for confirmation before powering on.

  • Power off — gracefully shuts down the VM. The portal asks for confirmation before proceeding.

  • Reboot — a controlled reboot. The portal asks for confirmation before proceeding.

  • Resume — only shown when the VM is Suspended, brings it back to a running state. Runs immediately when clicked, with no confirmation step.

  • Rename — always shown, regardless of status. Opens a dialog to enter a new name for the VM (up to 255 characters).

    Rename VM dialog

  • Delete — always shown. The VM and all of its data are permanently deleted and cannot be recovered. To prevent accidental deletion, you must type the exact random confirmation code the portal shows in the dialog before the delete button becomes enabled.

    Delete confirmation dialog with a random confirmation code

Deleting multiple VMs at once

Select the checkbox next to each VM you want to delete — a toolbar appears above the table with a Delete button showing the selected count. The confirmation works the same way as deleting a single VM: you must type the random confirmation code shown before the deletion goes through.