Network Interface on a VM
Each VM can have multiple Network Interfaces (NICs) to connect to several Networks/Subnets at the same time. Useful when:
- Separating internal and public traffic onto two different interfaces.
- A VM acts as a gateway or NAT between networks.
- You need several internal IPs on the same VM (e.g. multiple services on the same host).
The Network tab on the VM detail page shows every Floating IP and Network Interface currently attached:
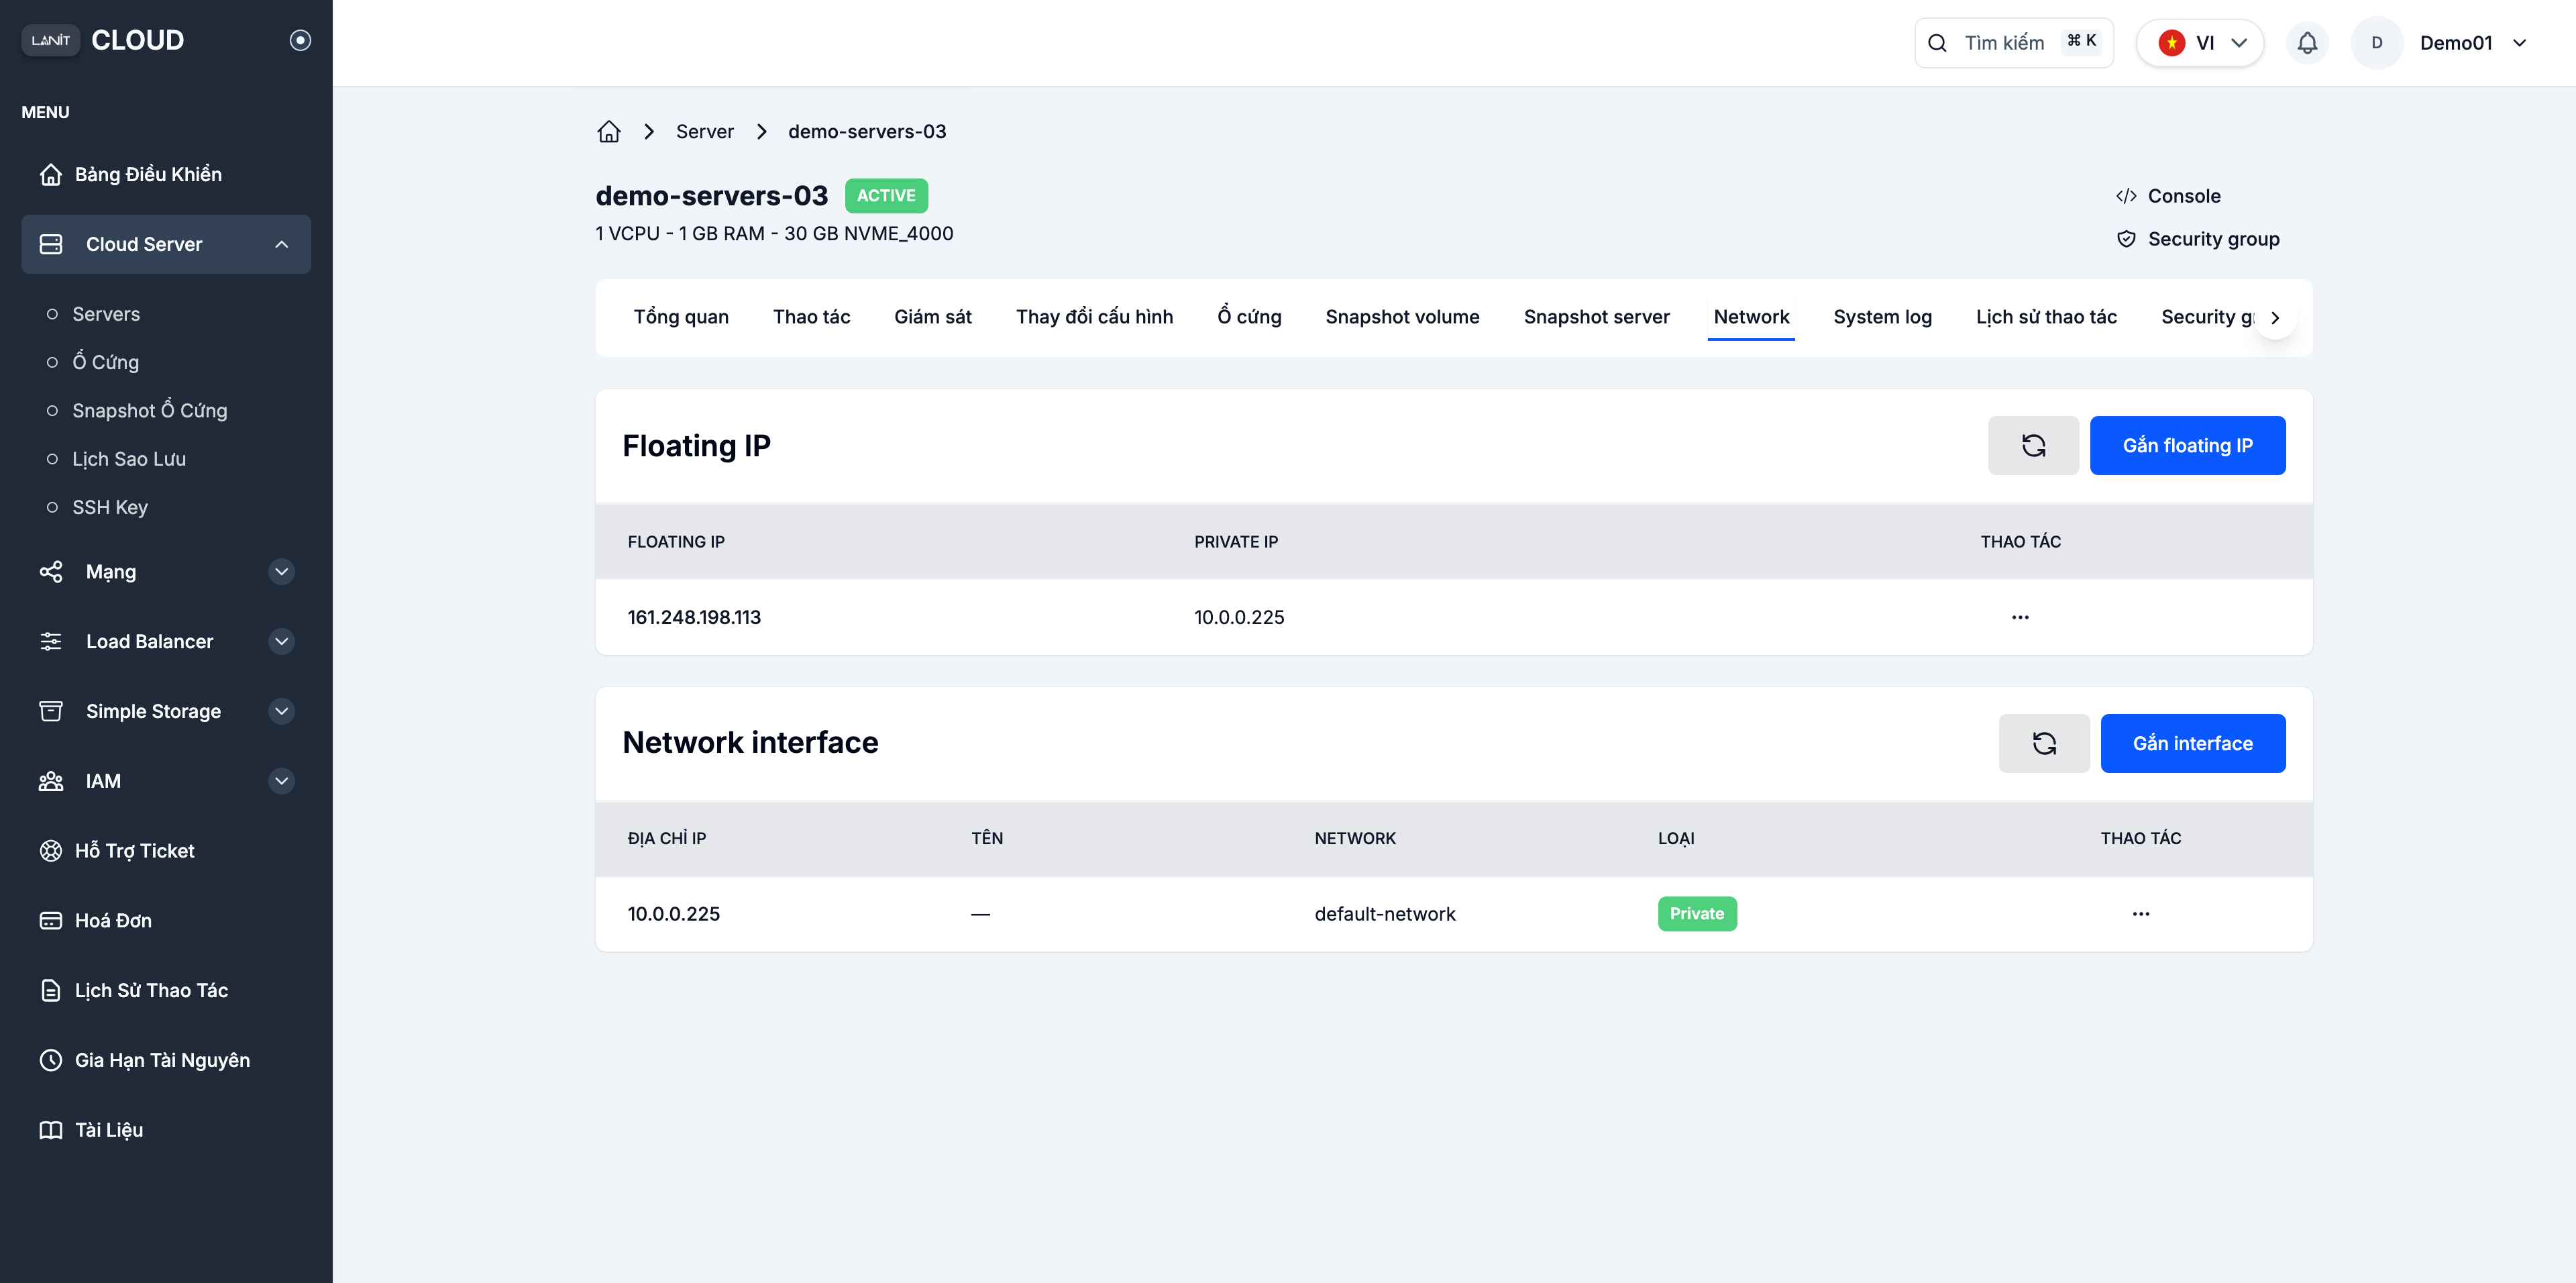
Attach a new Network Interface
Step 1. Open the VM detail page
Go to Cloud Server → Servers → click the VM, then open the Network tab. In the Network interface section, click Gắn interface.

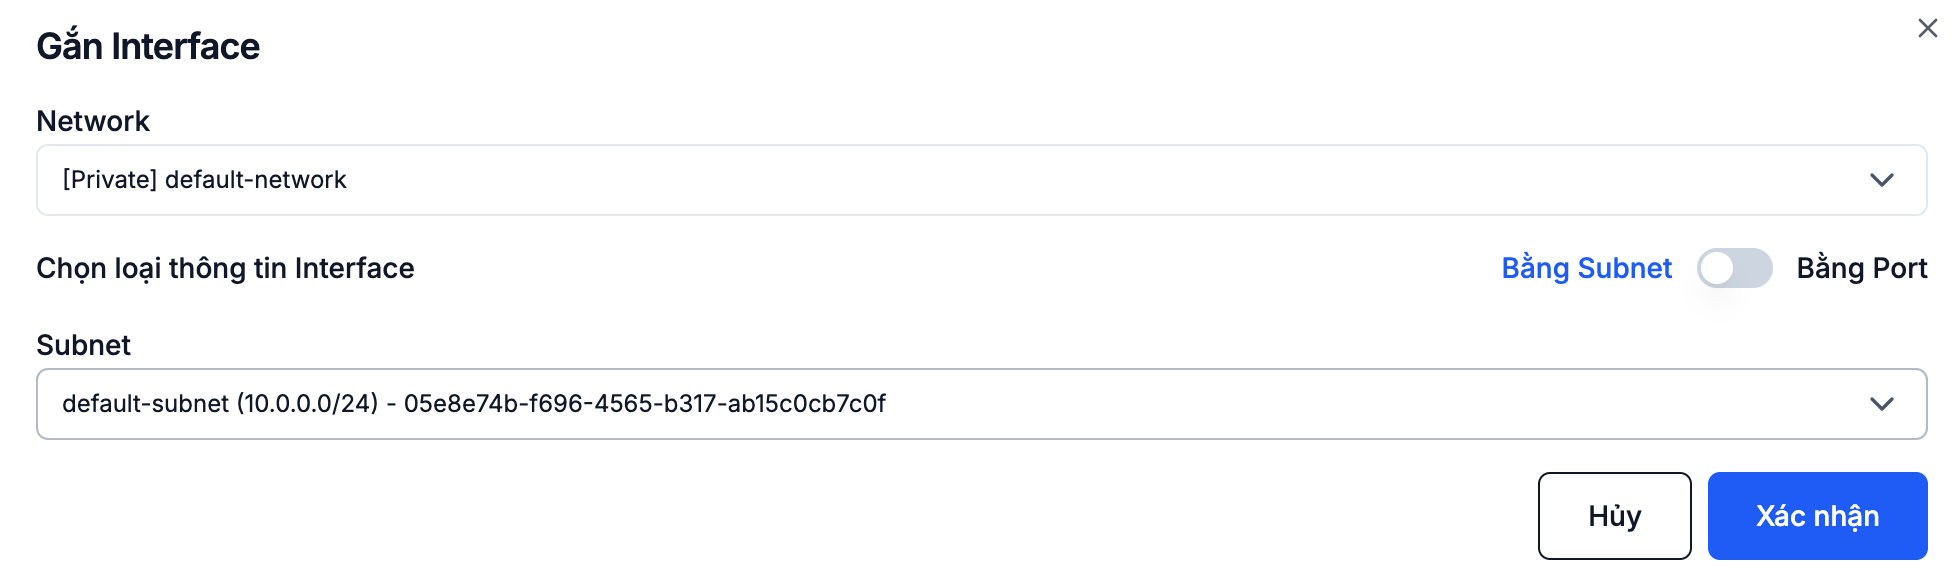
Step 2. Pick the Network and IP
- Network / Subnet — pick the network to connect to.
- IP Address (optional) — type a static IP if you want one; leave it empty for the system to allocate from the DHCP pool.
Click Confirm.
The new interface appears in the list. Inside the OS, you may need to run dhclient, netplan apply or the equivalent for the OS to pick up the new interface.
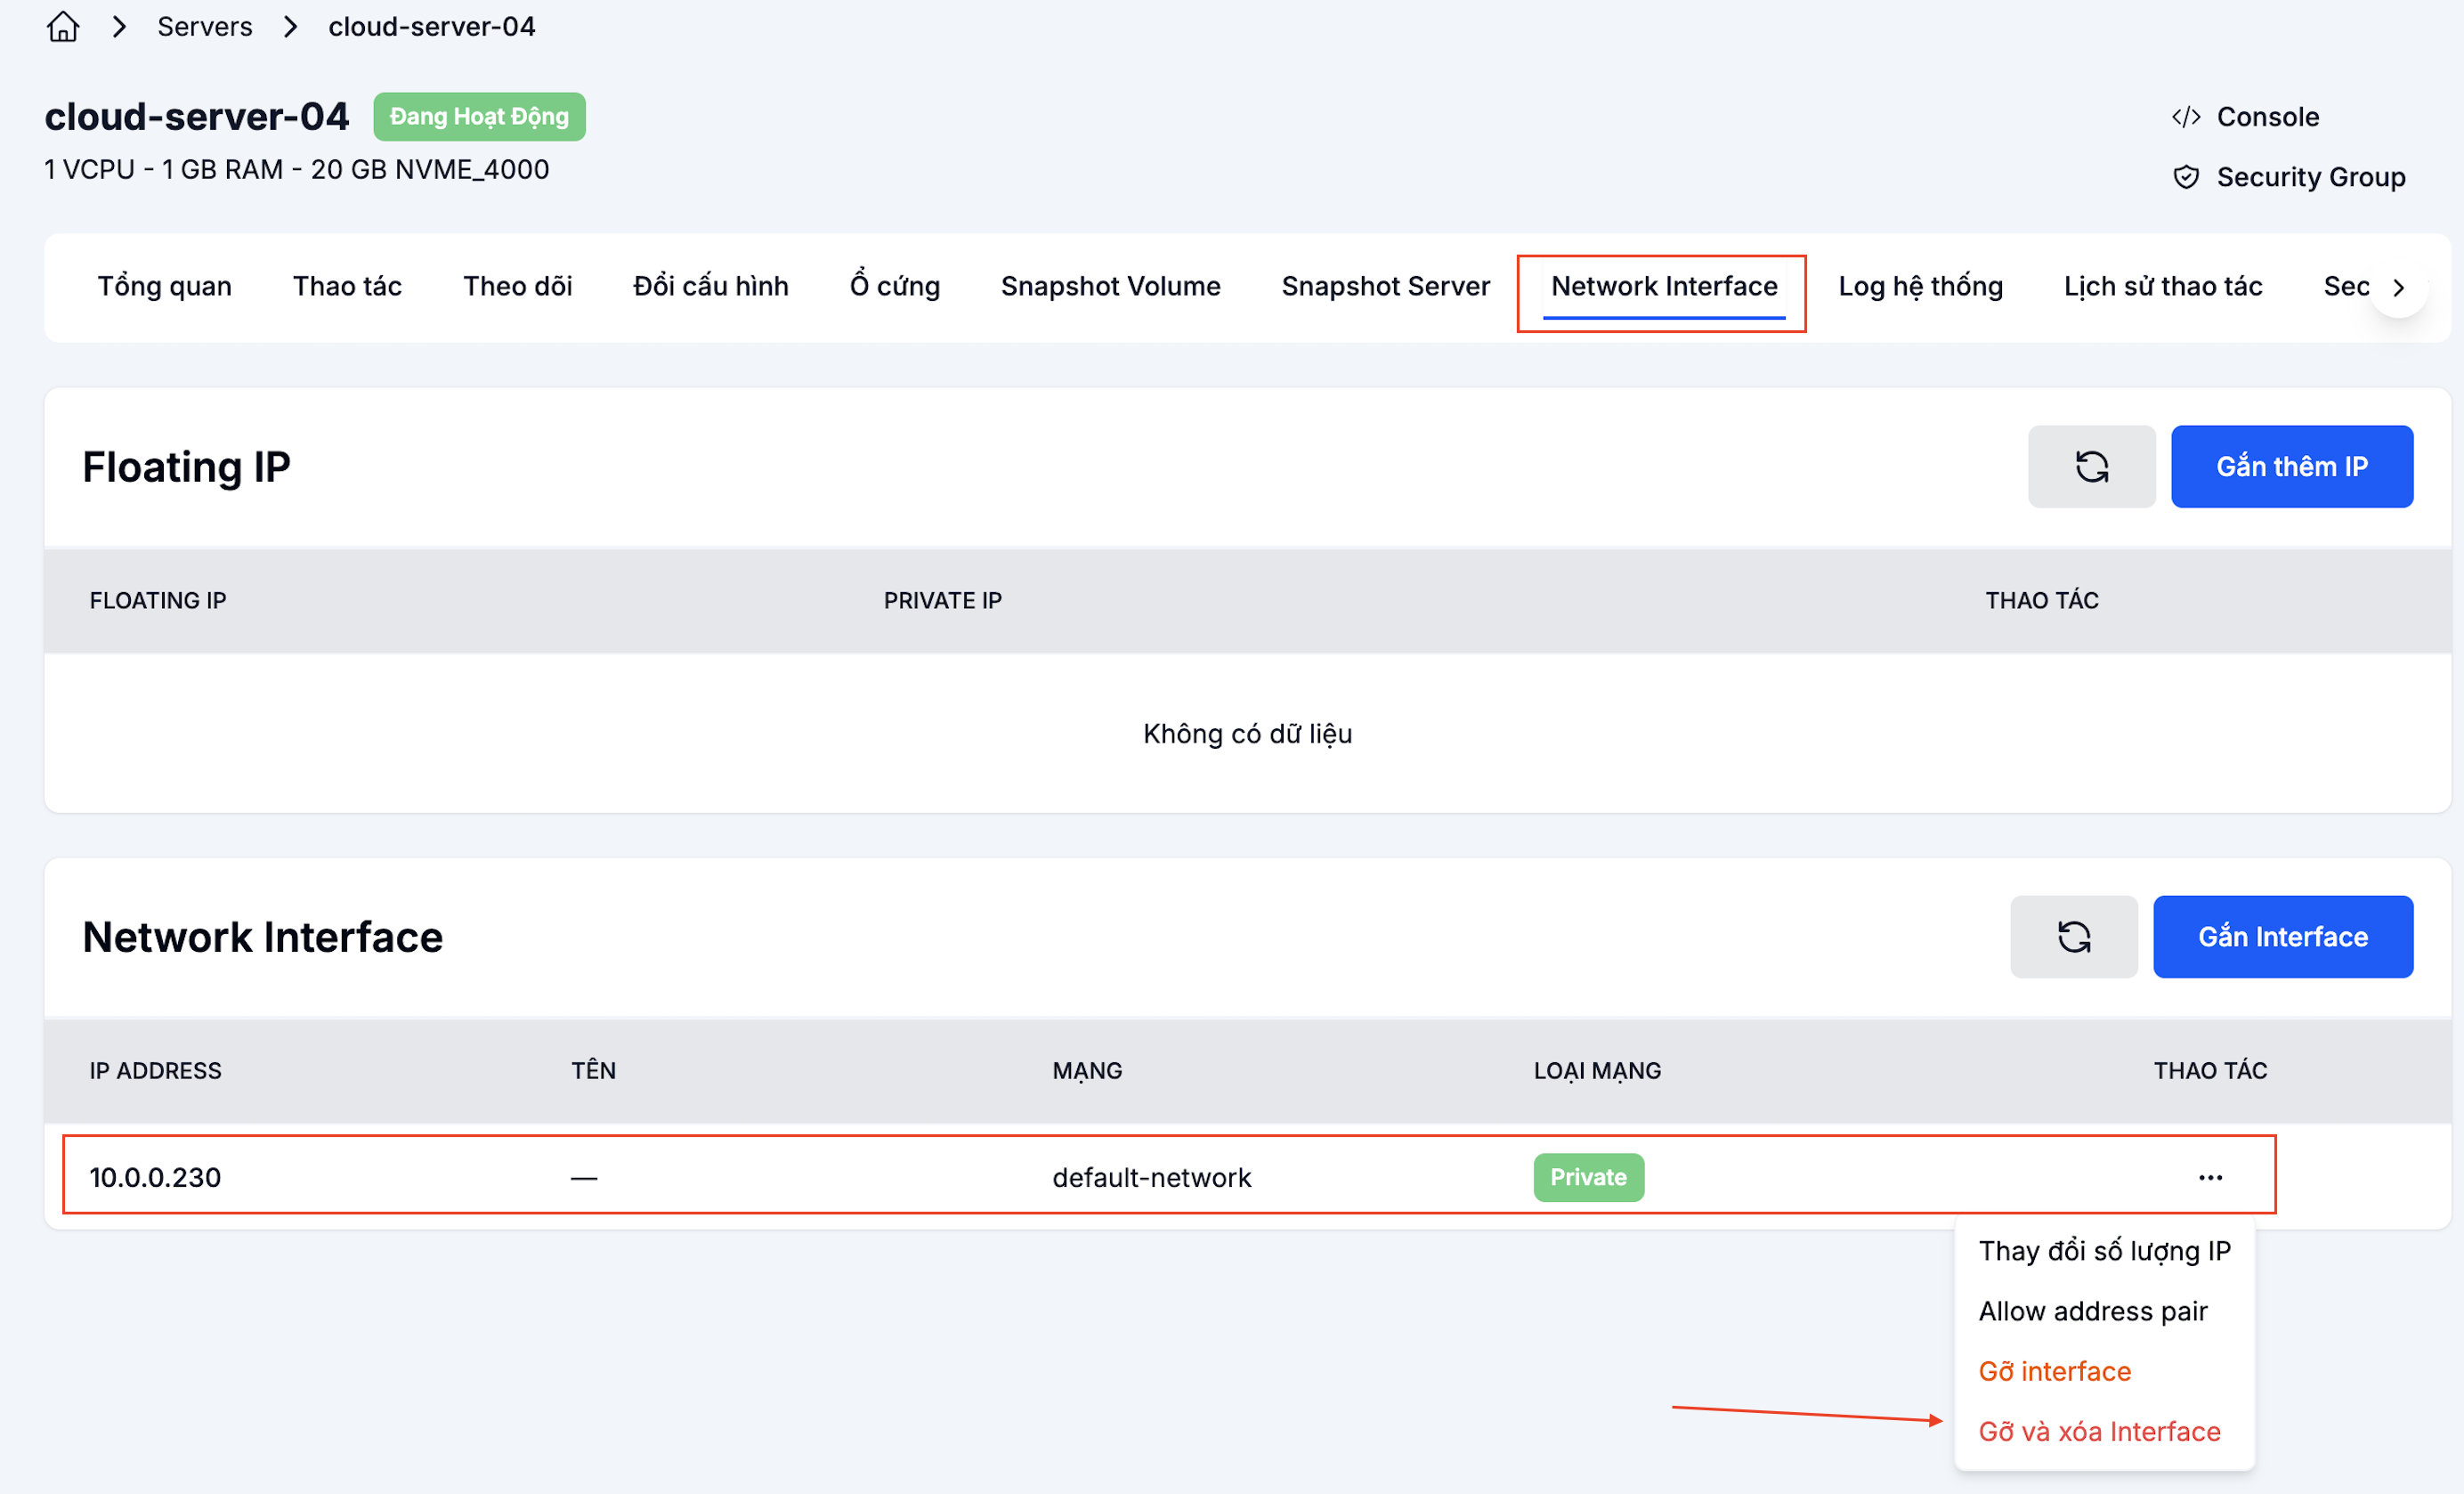
Detach a Network Interface
Step 1. Open the action menu
In the Network Interface section, click ⋯ next to the interface → Detach and delete interface.
Step 2. Confirm

If you detach the interface carrying your SSH session, you lose the connection immediately. Make sure at least one of these is still available:
- Another Network Interface on the VM.
- Portal Console access.
See also
- Network Interface — centralised interface management across the account.
- Floating IP — assign a public IP to an interface.
- Security Group — attach a firewall to each interface.